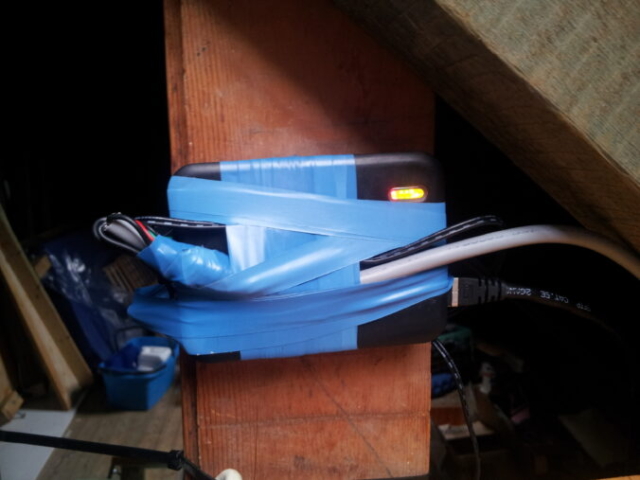
Der Raspberry Pi 4 , egal ob mit 4GB oder 8GB RAM, ist in der Kombination mit Kodi eine wunderbare Erweiterung am Fernseher. Leider sorgte die letzte Version Kodi v19.3 (Matrix) bei mir für ein paar Problemchen. So stockte oder ruckelte die Wiedergabe von Videos oder die Wiedergabe lief für einige Minuten gut, dann wurde gebuffert, nur damit sich dieses Spielchen alle paar Minuten wiederholte. Egal ob im WLAN oder direkt am LAN.
Folgende Änderungen haben bei mir für eine Lösung der Probleme gesorgt:
Erstellen einer XML Datei, welche die default Einstellungen des Cachings überschreibt.
Speicherort und Dateiname ist: /storage/.kodi/userdata/advancedsettings.xml
Achtung… Bei XML Dateien, spielt das richtige „Einrücken“ schon mal eine Rolle
2. Erweitern des Arbeitsspeichers für die GPU, sowie das Erzwingen des „Turbo“ Modus. Dafür einfach die Datei /flash/config.txt um folgende Zeilen erweitern/einpassen:
Plain text
Copy to clipboard
Open code in new window
EnlighterJS 3 Syntax Highlighter
# Default GPU memory split, 76MB are needed for H264 decoder
gpu_mem=256
force_turbo=1
# Default GPU memory split, 76MB are needed for H264 decoder
gpu_mem=256
force_turbo=1
# Default GPU memory split, 76MB are needed for H264 decoder
gpu_mem=256
force_turbo=1
Wer dieses gerne per SSH machen möchte, muss das Volume /flash einmal schreibfähig mounten:
Plain text
Copy to clipboard
Open code in new window
EnlighterJS 3 Syntax Highlighter
mount -o remount,rw /flash
Die Option gpu_mem setzt recht einfach den, für die Grafikkarte, reservierten Arbeitsspeicher fest auf 256MB. Dieses macht selbst bei der 4GB Raspberry PI 4 Version kein Problem.
force_turbo deaktiviert das dynamische, lastabhängige takten der CPU, GPU und des Arbeitsspeichers, sowie der Spannungen. Alles läuft daher auf Maximum, aber ohne zu übertakten. Dieses hat weniger Auswirkungen auf die Probleme bei der Wiedergabe, sorgt aber für ein allgemein „flüssigeres“ Verhalten. Dafür steigt die Stromaufnahme und die Temperatur. Da wir hier über einen Raspberry sprechen, ist es wohl für die Meisten zu vernachlässigen.
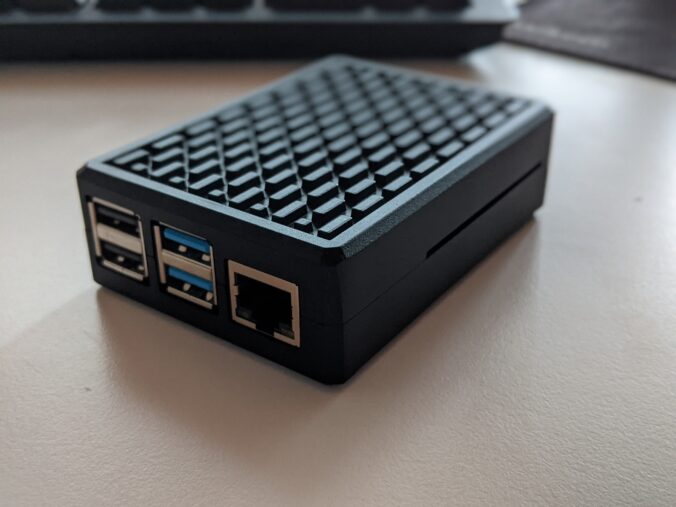
3. Um Temperatur und Geräuschpegel im Zaum zu halten, empfiehlt sich ein gutes passiv gekühltes Gehäuse. Folgendes kann ich empfehlen: https://amzn.to/3qF61pe
Das mitgelieferte Netzteil hat ausreichend Power, man kommt noch an „alles“ ran, das Gehäuse ist sehr massiv und selbst bei großer Last/langem Betrieb, wird alles nur handwarm.
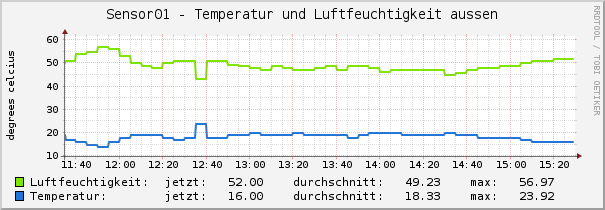
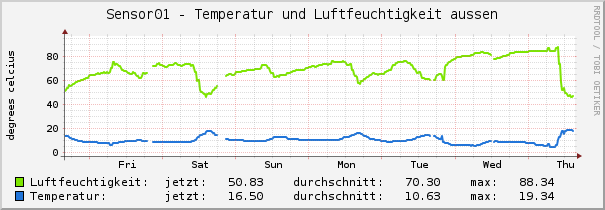
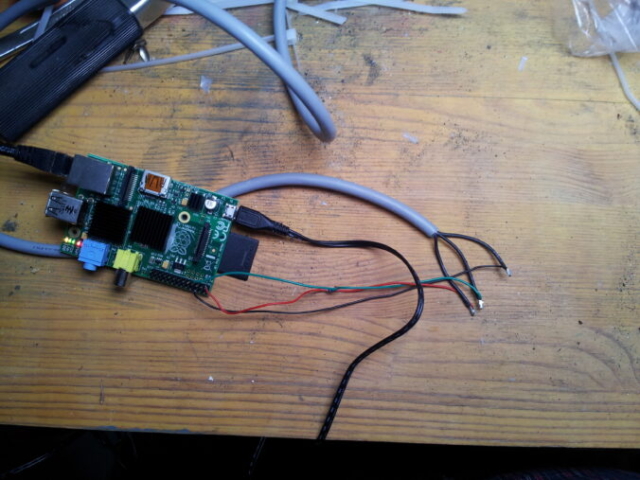
Meine Wetterstation hat aufgegeben OK, wirklich interessant war für mich immer nur Luftfeuchtigkeit und Temperatur draußen. Diese Aufgabe sollte doch von meinem Raspberry Pi erfüllt werden können, oder? Dann hätte ich die Daten zusätzlich direkt in meinem Cacti!
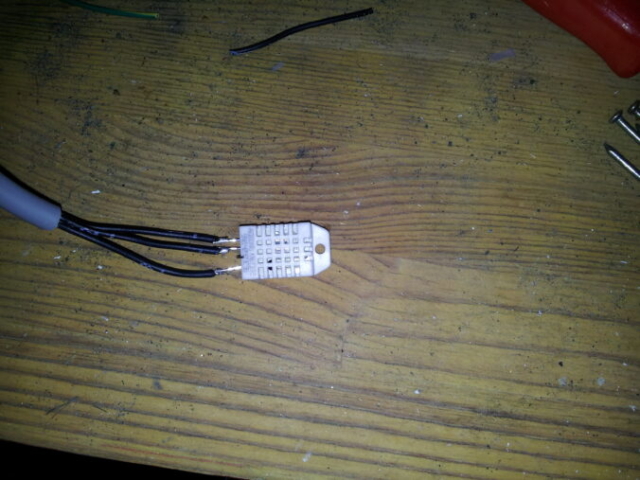
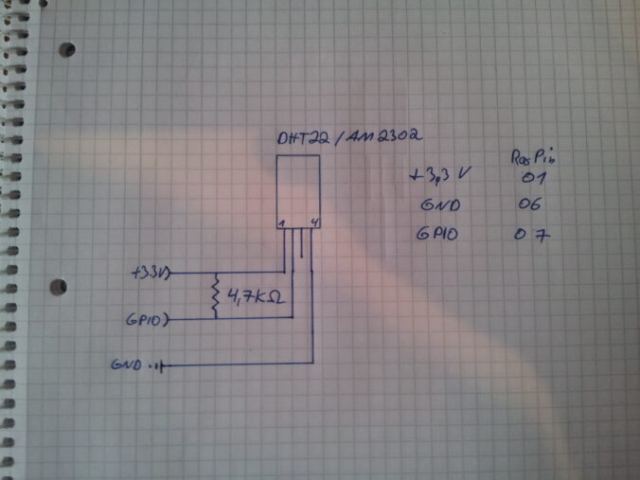
Ich setzte dabei auf den DHT22 / AM2302. Über Amazon war dieser für 2€ schnell bestellt. Ein 4,7kΩ Widerstand hatte ich selbstverständlich noch. Das eigentliche Schaltbild ist nicht weiter der Rede wert, ich habe da ein Bild für euch weiter unten…
Zur Software…
Nötig ist git für wiringPi und lol_dht22
Erstmal eine root Konsole auf dem Raspberry Pi öffnen:
Plain text
Copy to clipboard
Open code in new window
EnlighterJS 3 Syntax Highlighter
$ sudo /bin/bash
$ sudo /bin/bash
$ sudo /bin/bash
Alle Tools für git installieren:
Plain text
Copy to clipboard
Open code in new window
EnlighterJS 3 Syntax Highlighter
$ apt-get install git-core
Dann einen clone von wiringPi ziehen und kompilieren:
Plain text
Copy to clipboard
Open code in new window
EnlighterJS 3 Syntax Highlighter
$ git clone git://git.drogon.net/wiringPi
$ cd wiringPi
$ ./build
$ cd ..
$ git clone git://git.drogon.net/wiringPi
$ cd wiringPi
$ ./build
$ cd ..
$ git clone git://git.drogon.net/wiringPi
$ cd wiringPi
$ ./build
$ cd ..
Jetzt noch schnell lol_dht22, dieses Programm liest den eigentlichen Sensor aus.
Plain text
Copy to clipboard
Open code in new window
EnlighterJS 3 Syntax Highlighter
$ git clone https://github.com/technion/lol_dht22
$ cd lol_dht22
$ ./configure
$ make
$ git clone https://github.com/technion/lol_dht22
$ cd lol_dht22
$ ./configure
$ make
$ git clone https://github.com/technion/lol_dht22
$ cd lol_dht22
$ ./configure
$ make
Damit sollte sich bereits der Sensor auslesen lassen:
Plain text
Copy to clipboard
Open code in new window
EnlighterJS 3 Syntax Highlighter
$ ./loldht 7
Raspberry Pi wiringPi DHT22 reader
www.lolware.net
Data not good, skip
Humidity = 73.90 % Temperature = 9.30 *C
$ ./loldht 7
Raspberry Pi wiringPi DHT22 reader
www.lolware.net
Data not good, skip
Humidity = 73.90 % Temperature = 9.30 *C
$ ./loldht 7
Raspberry Pi wiringPi DHT22 reader
www.lolware.net
Data not good, skip
Humidity = 73.90 % Temperature = 9.30 *C
Perfekt Nun benötige ich natürlich nur die beiden Zahlen. Daher habe ich den Code etwas angepasst. So bekomme ich jetzt nur noch die beiden Werte beim Aufruf:
Plain text
Copy to clipboard
Open code in new window
EnlighterJS 3 Syntax Highlighter
$ /lol_dht22/loldht 7
73.90
9.30
$ /lol_dht22/loldht 7
73.90
9.30
$ /lol_dht22/loldht 7
73.90
9.30
Diese sammle ich nun per Bash-Script über einen Cron-Job ein und lege sie in zwei Files.
Plain text
Copy to clipboard
Open code in new window
EnlighterJS 3 Syntax Highlighter
$ crontab -l
***** /var/scripts/getsensor.sh
$ crontab -l
* * * * * /var/scripts/getsensor.sh
$ crontab -l
* * * * * /var/scripts/getsensor.sh
Hier das vom Cron aufgerufene Script:
Plain text
Copy to clipboard
Open code in new window
EnlighterJS 3 Syntax Highlighter
$ cat /var/scripts/getsensor.sh
#!/bin/bash
/lol_dht22/loldht 7> /home/pi/both.txt
while[ ! -s "/home/pi/both.txt"]
do
sleep 5
/lol_dht22/loldht 7> /home/pi/both.txt
done
sed '2d' /home/pi/both.txt> /home/pi/humid.txt
sed '1d' /home/pi/both.txt> /home/pi/temp.txt
$ cat /var/scripts/getsensor.sh
#!/bin/bash
/lol_dht22/loldht 7 > /home/pi/both.txt
while [ ! -s "/home/pi/both.txt" ]
do
sleep 5
/lol_dht22/loldht 7 > /home/pi/both.txt
done
sed '2d' /home/pi/both.txt > /home/pi/humid.txt
sed '1d' /home/pi/both.txt > /home/pi/temp.txt
$ cat /var/scripts/getsensor.sh
#!/bin/bash
/lol_dht22/loldht 7 > /home/pi/both.txt
while [ ! -s "/home/pi/both.txt" ]
do
sleep 5
/lol_dht22/loldht 7 > /home/pi/both.txt
done
sed '2d' /home/pi/both.txt > /home/pi/humid.txt
sed '1d' /home/pi/both.txt > /home/pi/temp.txt
Damit liegen nun immer die aktuellen Werte für Temperatur und Luftfeuchtigkeit in den beiden Textfiles unter /home/pi.
Jetzt sollen diesen Daten natürlich noch per snmp abgerufen werden können, damit ich sie in Cacti einbinden kann. Also zuerst snmp auf dem Raspberry Pi installieren:
Plain text
Copy to clipboard
Open code in new window
EnlighterJS 3 Syntax Highlighter
$ apt-get install snmp snmpd
Unter „Pass-through“ MIB extension command lege ich nun zwei weitere an, für Temperatur und Luftfeuchtigkeit:
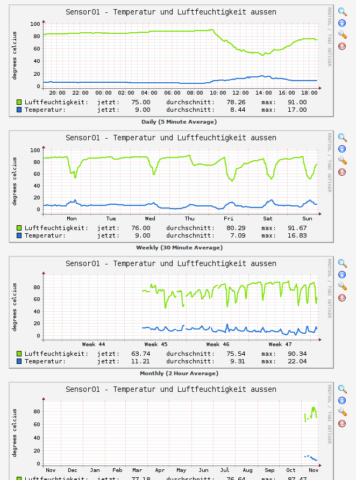
Dieses lässt sich nun im Cacti einbinden und so aufzeichnen. Ok, etwas von hinten durch die Brust ins Auge… Sicher optimiere ich dieses noch
Ach ja, wer es braucht… Die Template-Exports für Cacti sind hier: cacti-temp.tar.gz
Und wohin mit dem Teil? Diese Frage hat mich etwas beschäftigt. Ich wollte es draußen haben, denn ich brauche ja die Daten von draußen Dafür muss es geschützt vor Wasser sein. Um die Luftfeuchtigkeit messen zu können darf es denn noch nicht komplett verschlossen sein. Ebenfalls sollte es an einer Stelle hängen, an welcher es nicht zu schlecht aussieht und vor allem, an welcher es nicht zerstört wird.
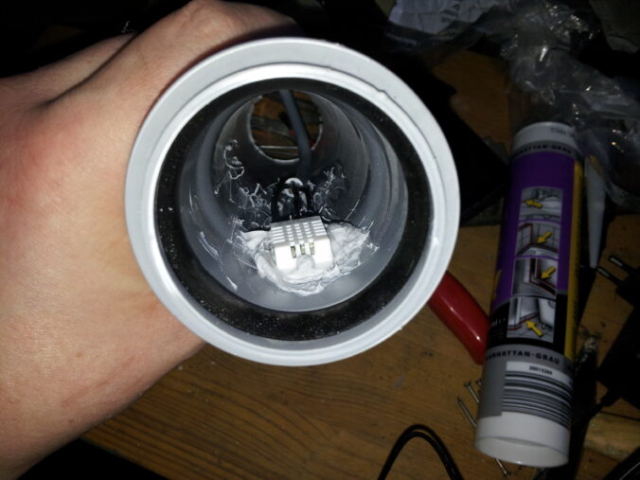
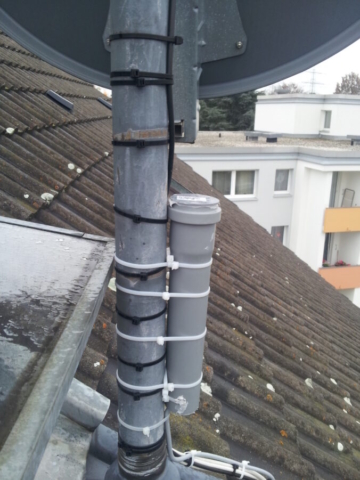
Ich habe einfach ein Rohr genommen, den Sensor dort mit etwas Silikon „eingeklebt“ und das Rohr an einer Seite mit einem Deckel verschlossen. So sollte kein Wasser an den Sensor laufen können. Angebracht habe ich dieses Rohr an meinem Pfosten der Satellitenschüssel. Dort oben „steht“ die Luft eher selten und es kommt niemand ran. Zusätzlich fällt es dort nicht weiter auf.
Mal abwarten wie es sich dort oben macht. Vielleicht hänge ich es später noch mal um! Sobald sich die eigentliche Position gefestigt hat, wird dann auch der Raspberry PI ordentlich verstaut ;-P
We use cookies on our website to give you the most relevant experience by remembering your preferences and repeat visits. By clicking “Accept All”, you consent to the use of ALL the cookies. However, you may visit "Cookie Settings" to provide a controlled consent.
This website uses cookies to improve your experience while you navigate through the website. Out of these, the cookies that are categorized as necessary are stored on your browser as they are essential for the working of basic functionalities of the ...
Necessary cookies are absolutely essential for the website to function properly. These cookies ensure basic functionalities and security features of the website, anonymously.
Cookie
Dauer
Beschreibung
cookielawinfo-checkbox-advertisement
1 year
Set by the GDPR Cookie Consent plugin, this cookie is used to record the user consent for the cookies in the "Advertisement" category .
cookielawinfo-checkbox-analytics
1 year
Set by the GDPR Cookie Consent plugin, this cookie is used to record the user consent for the cookies in the "Analytics" category .
cookielawinfo-checkbox-necessary
1 year
Set by the GDPR Cookie Consent plugin, this cookie is used to record the user consent for the cookies in the "Necessary" category .
cookielawinfo-checkbox-others
1 year
This cookie is set by GDPR Cookie Consent plugin. The cookie is used to store the user consent for the cookies in the category "Others".
cookielawinfo-checkbox-performance
1 year
Set by the GDPR Cookie Consent plugin, this cookie is used to store the user consent for cookies in the category "Performance".
Functional cookies help to perform certain functionalities like sharing the content of the website on social media platforms, collect feedbacks, and other third-party features.
Performance cookies are used to understand and analyze the key performance indexes of the website which helps in delivering a better user experience for the visitors.
Analytical cookies are used to understand how visitors interact with the website. These cookies help provide information on metrics the number of visitors, bounce rate, traffic source, etc.
Cookie
Dauer
Beschreibung
CONSENT
16 years 3 months 22 days 14 hours
These cookies are set via embedded youtube-videos. They register anonymous statistical data on for example how many times the video is displayed and what settings are used for playback.No sensitive data is collected unless you log in to your google account, in that case your choices are linked with your account, for example if you click “like” on a video.
Advertisement cookies are used to provide visitors with relevant ads and marketing campaigns. These cookies track visitors across websites and collect information to provide customized ads.
Cookie
Dauer
Beschreibung
yt-remote-connected-devices
never
These cookies are set via embedded youtube-videos.
yt-remote-device-id
never
These cookies are set via embedded youtube-videos.