Datenhaufen zu IT und Elektronik.

Schlagwort: Security (Seite 1 von 4)

Sicherheitslücken melden: Mein Umgang mit einem Vulnerability Report

Vulnerability Report

Vor Kurzem habe ich einen Vulnerability Report erhalten. Ich freue mich natürlich immer über solche Hinweise – sie helfen mir, zu wachsen und mein Setup zu verbessern, bevor jemand eine Schwachstelle tatsächlich ausnutzt.

Der Report lautet wie folgt:

Subject: Vulnerability Report: Vulnerable System Detected at openpgpkey.kernel-error.com

Hello Team,

I have identified a security issue in your system related to a vulnerability (CVE-2023-48795) in Terrapin.

Vulnerability Details:
- CVE Identifier: CVE-2023-48795
- Vulnerability Type: javascript
- Severity: medium
- Host: openpgpkey.kernel-error.com
- Affected Port: 22

Description: A security vulnerability (CVE-2023-48795) related to Terrapin has been detected in your system. This vulnerability could be exploited to compromise your system's security. Please see the details below for more information.

Impact: Impact:
1. Potential for Unauthorized Access: Attackers may exploit this vulnerability to gain unauthorized access.
2. System Compromise: Vulnerable systems could be compromised, leading to data loss or further attacks.
3. Increased Attack Surface: Exposing systems with this vulnerability increases the risk of exploitation.


Recommendation: Recommendation:
1. Apply patches for CVE-2023-48795: Ensure your systems are updated to address this vulnerability.
2. Conduct a Security Review: Regularly review and update your security policies and procedures.
3. Monitor for Suspicious Activity: Implement continuous monitoring to detect any potential exploitation attempts.
4. Restrict Access: Limit access to systems vulnerable to exploitation.


Best Regards,
Security Team

Ich war mir eigentlich sicher, dass ich Terrapin schon vor langer Zeit überall gepatcht und in den SSH-Konfigurationen berücksichtigt hatte.

Dann kam der Hinweis auf openpgpkey.kernel-error.com. Die Domain existiert als CNAME und gehört zur Web Key Directory (WKD), was im Groben dazu dient, öffentliche GPG-Keys möglichst automatisiert abrufen zu können. Wenn mir also jemand eine Mail schreiben möchte, aber meinen öffentlichen Key nicht hat, kann er diesen einfach über WKD beziehen. Ich habe das Ganze als CNAME zu wkd.keys.openpgp.org angelegt, weil dieser Keyserver zumindest eine E-Mail-Validierung beim Hochladen öffentlicher Schlüssel durchführt. Ich muss ja nicht jede Infrastruktur selbst betreiben.

Allerdings gehört der betroffene SSH-Server und das gesamte Zielsystem somit gar nicht zu meiner Infrastruktur – ich kann also selbst nichts tun.

Vulnerability Type: JavaScript

Das verstehe ich nicht ganz. Vermutlich hat der Finder einfach sein Standard-Template benutzt und nicht angepasst?! Aber zumindest wollte ich prüfen, ob seine Einschätzung zum SSH-Server überhaupt zutrifft:

Plain text
Copy to clipboard
Open code in new window
EnlighterJS 3 Syntax Highlighter
# general
(gen) banner: SSH-2.0-OpenSSH_8.4p1 Debian-5+deb11u3
(gen) software: OpenSSH 8.4p1
(gen) compatibility: OpenSSH 7.4+, Dropbear SSH 2018.76+
(gen) compression: enabled (zlib@openssh.com)
# security
(cve) CVE-2021-41617 -- (CVSSv2: 7.0) privilege escalation via supplemental groups
(cve) CVE-2016-20012 -- (CVSSv2: 5.3) enumerate usernames via challenge response
# key exchange algorithms
(kex) curve25519-sha256 -- [info] available since OpenSSH 7.4, Dropbear SSH 2018.76
`- [info] default key exchange since OpenSSH 6.4
(kex) curve25519-sha256@libssh.org -- [info] available since OpenSSH 6.4, Dropbear SSH 2013.62
`- [info] default key exchange since OpenSSH 6.4
(kex) ecdh-sha2-nistp256 -- [fail] using elliptic curves that are suspected as being backdoored by the U.S. National Security Agency
`- [info] available since OpenSSH 5.7, Dropbear SSH 2013.62
(kex) ecdh-sha2-nistp384 -- [fail] using elliptic curves that are suspected as being backdoored by the U.S. National Security Agency
`- [info] available since OpenSSH 5.7, Dropbear SSH 2013.62
(kex) ecdh-sha2-nistp521 -- [fail] using elliptic curves that are suspected as being backdoored by the U.S. National Security Agency
`- [info] available since OpenSSH 5.7, Dropbear SSH 2013.62
(kex) diffie-hellman-group-exchange-sha256 (3072-bit) -- [info] available since OpenSSH 4.4
`- [info] OpenSSH's GEX fallback mechanism was triggered during testing. Very old SSH clients will still be able to create connections using a 2048-bit modulus, though modern clients will use 3072. This can only be disabled by recompiling the code (see https://github.com/openssh/openssh-portable/blob/V_9_4/dh.c#L477).
(kex) diffie-hellman-group16-sha512 -- [info] available since OpenSSH 7.3, Dropbear SSH 2016.73
(kex) diffie-hellman-group18-sha512 -- [info] available since OpenSSH 7.3
(kex) diffie-hellman-group14-sha256 -- [warn] 2048-bit modulus only provides 112-bits of symmetric strength
`- [info] available since OpenSSH 7.3, Dropbear SSH 2016.73
(kex) kex-strict-s-v00@openssh.com -- [info] pseudo-algorithm that denotes the peer supports a stricter key exchange method as a counter-measure to the Terrapin attack (CVE-2023-48795)
# host-key algorithms
(key) rsa-sha2-512 (2048-bit) -- [warn] 2048-bit modulus only provides 112-bits of symmetric strength
`- [info] available since OpenSSH 7.2
(key) rsa-sha2-256 (2048-bit) -- [warn] 2048-bit modulus only provides 112-bits of symmetric strength
`- [info] available since OpenSSH 7.2
(key) ssh-rsa (2048-bit) -- [fail] using broken SHA-1 hash algorithm
`- [warn] 2048-bit modulus only provides 112-bits of symmetric strength
`- [info] available since OpenSSH 2.5.0, Dropbear SSH 0.28
`- [info] deprecated in OpenSSH 8.8: https://www.openssh.com/txt/release-8.8
(key) ecdsa-sha2-nistp256 -- [fail] using elliptic curves that are suspected as being backdoored by the U.S. National Security Agency
`- [warn] using weak random number generator could reveal the key
`- [info] available since OpenSSH 5.7, Dropbear SSH 2013.62
(key) ssh-ed25519 -- [info] available since OpenSSH 6.5
# encryption algorithms (ciphers)
(enc) chacha20-poly1305@openssh.com -- [info] available since OpenSSH 6.5
`- [info] default cipher since OpenSSH 6.9
(enc) aes128-ctr -- [info] available since OpenSSH 3.7, Dropbear SSH 0.52
(enc) aes192-ctr -- [info] available since OpenSSH 3.7
(enc) aes256-ctr -- [info] available since OpenSSH 3.7, Dropbear SSH 0.52
(enc) aes128-gcm@openssh.com -- [info] available since OpenSSH 6.2
(enc) aes256-gcm@openssh.com -- [info] available since OpenSSH 6.2
# message authentication code algorithms
(mac) umac-64-etm@openssh.com -- [warn] using small 64-bit tag size
`- [info] available since OpenSSH 6.2
(mac) umac-128-etm@openssh.com -- [info] available since OpenSSH 6.2
(mac) hmac-sha2-256-etm@openssh.com -- [info] available since OpenSSH 6.2
(mac) hmac-sha2-512-etm@openssh.com -- [info] available since OpenSSH 6.2
(mac) hmac-sha1-etm@openssh.com -- [fail] using broken SHA-1 hash algorithm
`- [info] available since OpenSSH 6.2
(mac) umac-64@openssh.com -- [warn] using encrypt-and-MAC mode
`- [warn] using small 64-bit tag size
`- [info] available since OpenSSH 4.7
(mac) umac-128@openssh.com -- [warn] using encrypt-and-MAC mode
`- [info] available since OpenSSH 6.2
(mac) hmac-sha2-256 -- [warn] using encrypt-and-MAC mode
`- [info] available since OpenSSH 5.9, Dropbear SSH 2013.56
(mac) hmac-sha2-512 -- [warn] using encrypt-and-MAC mode
`- [info] available since OpenSSH 5.9, Dropbear SSH 2013.56
(mac) hmac-sha1 -- [fail] using broken SHA-1 hash algorithm
`- [warn] using encrypt-and-MAC mode
`- [info] available since OpenSSH 2.1.0, Dropbear SSH 0.28
# fingerprints
(fin) ssh-ed25519: SHA256:vwCCSg+OuRwAflHQs/+Y22UJ7p2lM57vbukGFt5AAaY
(fin) ssh-rsa: SHA256:o+WUM9bAmH2G5xMAsJfZRsmh8hvMoU4dx9gdmahLM+M
# algorithm recommendations (for OpenSSH 8.4)
(rec) -ecdh-sha2-nistp256 -- kex algorithm to remove
(rec) -ecdh-sha2-nistp384 -- kex algorithm to remove
(rec) -ecdh-sha2-nistp521 -- kex algorithm to remove
(rec) -ecdsa-sha2-nistp256 -- key algorithm to remove
(rec) -hmac-sha1 -- mac algorithm to remove
(rec) -hmac-sha1-etm@openssh.com -- mac algorithm to remove
(rec) -ssh-rsa -- key algorithm to remove
(rec) !rsa-sha2-256 -- key algorithm to change (increase modulus size to 3072 bits or larger)
(rec) !rsa-sha2-512 -- key algorithm to change (increase modulus size to 3072 bits or larger)
(rec) -diffie-hellman-group14-sha256 -- kex algorithm to remove
(rec) -hmac-sha2-256 -- mac algorithm to remove
(rec) -hmac-sha2-512 -- mac algorithm to remove
(rec) -umac-128@openssh.com -- mac algorithm to remove
(rec) -umac-64-etm@openssh.com -- mac algorithm to remove
(rec) -umac-64@openssh.com -- mac algorithm to remove
# additional info
(nfo) For hardening guides on common OSes, please see: <https://www.ssh-audit.com/hardening_guides.html>
(nfo) Be aware that, while this target properly supports the strict key exchange method (via the kex-strict-?-v00@openssh.com marker) needed to protect against the Terrapin vulnerability (CVE-2023-48795), all peers must also support this feature as well, otherwise the vulnerability will still be present. The following algorithms would allow an unpatched peer to create vulnerable SSH channels with this target: chacha20-poly1305@openssh.com. If any CBC ciphers are in this list, you may remove them while leaving the *-etm@openssh.com MACs in place; these MACs are fine while paired with non-CBC cipher types.
# general (gen) banner: SSH-2.0-OpenSSH_8.4p1 Debian-5+deb11u3 (gen) software: OpenSSH 8.4p1 (gen) compatibility: OpenSSH 7.4+, Dropbear SSH 2018.76+ (gen) compression: enabled (zlib@openssh.com) # security (cve) CVE-2021-41617 -- (CVSSv2: 7.0) privilege escalation via supplemental groups (cve) CVE-2016-20012 -- (CVSSv2: 5.3) enumerate usernames via challenge response # key exchange algorithms (kex) curve25519-sha256 -- [info] available since OpenSSH 7.4, Dropbear SSH 2018.76 `- [info] default key exchange since OpenSSH 6.4 (kex) curve25519-sha256@libssh.org -- [info] available since OpenSSH 6.4, Dropbear SSH 2013.62 `- [info] default key exchange since OpenSSH 6.4 (kex) ecdh-sha2-nistp256 -- [fail] using elliptic curves that are suspected as being backdoored by the U.S. National Security Agency `- [info] available since OpenSSH 5.7, Dropbear SSH 2013.62 (kex) ecdh-sha2-nistp384 -- [fail] using elliptic curves that are suspected as being backdoored by the U.S. National Security Agency `- [info] available since OpenSSH 5.7, Dropbear SSH 2013.62 (kex) ecdh-sha2-nistp521 -- [fail] using elliptic curves that are suspected as being backdoored by the U.S. National Security Agency `- [info] available since OpenSSH 5.7, Dropbear SSH 2013.62 (kex) diffie-hellman-group-exchange-sha256 (3072-bit) -- [info] available since OpenSSH 4.4 `- [info] OpenSSH's GEX fallback mechanism was triggered during testing. Very old SSH clients will still be able to create connections using a 2048-bit modulus, though modern clients will use 3072. This can only be disabled by recompiling the code (see https://github.com/openssh/openssh-portable/blob/V_9_4/dh.c#L477). (kex) diffie-hellman-group16-sha512 -- [info] available since OpenSSH 7.3, Dropbear SSH 2016.73 (kex) diffie-hellman-group18-sha512 -- [info] available since OpenSSH 7.3 (kex) diffie-hellman-group14-sha256 -- [warn] 2048-bit modulus only provides 112-bits of symmetric strength `- [info] available since OpenSSH 7.3, Dropbear SSH 2016.73 (kex) kex-strict-s-v00@openssh.com -- [info] pseudo-algorithm that denotes the peer supports a stricter key exchange method as a counter-measure to the Terrapin attack (CVE-2023-48795) # host-key algorithms (key) rsa-sha2-512 (2048-bit) -- [warn] 2048-bit modulus only provides 112-bits of symmetric strength `- [info] available since OpenSSH 7.2 (key) rsa-sha2-256 (2048-bit) -- [warn] 2048-bit modulus only provides 112-bits of symmetric strength `- [info] available since OpenSSH 7.2 (key) ssh-rsa (2048-bit) -- [fail] using broken SHA-1 hash algorithm `- [warn] 2048-bit modulus only provides 112-bits of symmetric strength `- [info] available since OpenSSH 2.5.0, Dropbear SSH 0.28 `- [info] deprecated in OpenSSH 8.8: https://www.openssh.com/txt/release-8.8 (key) ecdsa-sha2-nistp256 -- [fail] using elliptic curves that are suspected as being backdoored by the U.S. National Security Agency `- [warn] using weak random number generator could reveal the key `- [info] available since OpenSSH 5.7, Dropbear SSH 2013.62 (key) ssh-ed25519 -- [info] available since OpenSSH 6.5 # encryption algorithms (ciphers) (enc) chacha20-poly1305@openssh.com -- [info] available since OpenSSH 6.5 `- [info] default cipher since OpenSSH 6.9 (enc) aes128-ctr -- [info] available since OpenSSH 3.7, Dropbear SSH 0.52 (enc) aes192-ctr -- [info] available since OpenSSH 3.7 (enc) aes256-ctr -- [info] available since OpenSSH 3.7, Dropbear SSH 0.52 (enc) aes128-gcm@openssh.com -- [info] available since OpenSSH 6.2 (enc) aes256-gcm@openssh.com -- [info] available since OpenSSH 6.2 # message authentication code algorithms (mac) umac-64-etm@openssh.com -- [warn] using small 64-bit tag size `- [info] available since OpenSSH 6.2 (mac) umac-128-etm@openssh.com -- [info] available since OpenSSH 6.2 (mac) hmac-sha2-256-etm@openssh.com -- [info] available since OpenSSH 6.2 (mac) hmac-sha2-512-etm@openssh.com -- [info] available since OpenSSH 6.2 (mac) hmac-sha1-etm@openssh.com -- [fail] using broken SHA-1 hash algorithm `- [info] available since OpenSSH 6.2 (mac) umac-64@openssh.com -- [warn] using encrypt-and-MAC mode `- [warn] using small 64-bit tag size `- [info] available since OpenSSH 4.7 (mac) umac-128@openssh.com -- [warn] using encrypt-and-MAC mode `- [info] available since OpenSSH 6.2 (mac) hmac-sha2-256 -- [warn] using encrypt-and-MAC mode `- [info] available since OpenSSH 5.9, Dropbear SSH 2013.56 (mac) hmac-sha2-512 -- [warn] using encrypt-and-MAC mode `- [info] available since OpenSSH 5.9, Dropbear SSH 2013.56 (mac) hmac-sha1 -- [fail] using broken SHA-1 hash algorithm `- [warn] using encrypt-and-MAC mode `- [info] available since OpenSSH 2.1.0, Dropbear SSH 0.28 # fingerprints (fin) ssh-ed25519: SHA256:vwCCSg+OuRwAflHQs/+Y22UJ7p2lM57vbukGFt5AAaY (fin) ssh-rsa: SHA256:o+WUM9bAmH2G5xMAsJfZRsmh8hvMoU4dx9gdmahLM+M # algorithm recommendations (for OpenSSH 8.4) (rec) -ecdh-sha2-nistp256 -- kex algorithm to remove (rec) -ecdh-sha2-nistp384 -- kex algorithm to remove (rec) -ecdh-sha2-nistp521 -- kex algorithm to remove (rec) -ecdsa-sha2-nistp256 -- key algorithm to remove (rec) -hmac-sha1 -- mac algorithm to remove (rec) -hmac-sha1-etm@openssh.com -- mac algorithm to remove (rec) -ssh-rsa -- key algorithm to remove (rec) !rsa-sha2-256 -- key algorithm to change (increase modulus size to 3072 bits or larger) (rec) !rsa-sha2-512 -- key algorithm to change (increase modulus size to 3072 bits or larger) (rec) -diffie-hellman-group14-sha256 -- kex algorithm to remove (rec) -hmac-sha2-256 -- mac algorithm to remove (rec) -hmac-sha2-512 -- mac algorithm to remove (rec) -umac-128@openssh.com -- mac algorithm to remove (rec) -umac-64-etm@openssh.com -- mac algorithm to remove (rec) -umac-64@openssh.com -- mac algorithm to remove # additional info (nfo) For hardening guides on common OSes, please see: <https://www.ssh-audit.com/hardening_guides.html> (nfo) Be aware that, while this target properly supports the strict key exchange method (via the kex-strict-?-v00@openssh.com marker) needed to protect against the Terrapin vulnerability (CVE-2023-48795), all peers must also support this feature as well, otherwise the vulnerability will still be present. The following algorithms would allow an unpatched peer to create vulnerable SSH channels with this target: chacha20-poly1305@openssh.com. If any CBC ciphers are in this list, you may remove them while leaving the *-etm@openssh.com MACs in place; these MACs are fine while paired with non-CBC cipher types.
# general
(gen) banner: SSH-2.0-OpenSSH_8.4p1 Debian-5+deb11u3
(gen) software: OpenSSH 8.4p1
(gen) compatibility: OpenSSH 7.4+, Dropbear SSH 2018.76+
(gen) compression: enabled (zlib@openssh.com)

# security
(cve) CVE-2021-41617                        -- (CVSSv2: 7.0) privilege escalation via supplemental groups
(cve) CVE-2016-20012                        -- (CVSSv2: 5.3) enumerate usernames via challenge response

# key exchange algorithms
(kex) curve25519-sha256                     -- [info] available since OpenSSH 7.4, Dropbear SSH 2018.76
                                            `- [info] default key exchange since OpenSSH 6.4
(kex) curve25519-sha256@libssh.org          -- [info] available since OpenSSH 6.4, Dropbear SSH 2013.62
                                            `- [info] default key exchange since OpenSSH 6.4
(kex) ecdh-sha2-nistp256                    -- [fail] using elliptic curves that are suspected as being backdoored by the U.S. National Security Agency
                                            `- [info] available since OpenSSH 5.7, Dropbear SSH 2013.62
(kex) ecdh-sha2-nistp384                    -- [fail] using elliptic curves that are suspected as being backdoored by the U.S. National Security Agency
                                            `- [info] available since OpenSSH 5.7, Dropbear SSH 2013.62
(kex) ecdh-sha2-nistp521                    -- [fail] using elliptic curves that are suspected as being backdoored by the U.S. National Security Agency
                                            `- [info] available since OpenSSH 5.7, Dropbear SSH 2013.62
(kex) diffie-hellman-group-exchange-sha256 (3072-bit) -- [info] available since OpenSSH 4.4
                                                      `- [info] OpenSSH's GEX fallback mechanism was triggered during testing. Very old SSH clients will still be able to create connections using a 2048-bit modulus, though modern clients will use 3072. This can only be disabled by recompiling the code (see https://github.com/openssh/openssh-portable/blob/V_9_4/dh.c#L477).
(kex) diffie-hellman-group16-sha512         -- [info] available since OpenSSH 7.3, Dropbear SSH 2016.73
(kex) diffie-hellman-group18-sha512         -- [info] available since OpenSSH 7.3
(kex) diffie-hellman-group14-sha256         -- [warn] 2048-bit modulus only provides 112-bits of symmetric strength
                                            `- [info] available since OpenSSH 7.3, Dropbear SSH 2016.73
(kex) kex-strict-s-v00@openssh.com          -- [info] pseudo-algorithm that denotes the peer supports a stricter key exchange method as a counter-measure to the Terrapin attack (CVE-2023-48795)

# host-key algorithms
(key) rsa-sha2-512 (2048-bit)               -- [warn] 2048-bit modulus only provides 112-bits of symmetric strength
                                            `- [info] available since OpenSSH 7.2
(key) rsa-sha2-256 (2048-bit)               -- [warn] 2048-bit modulus only provides 112-bits of symmetric strength
                                            `- [info] available since OpenSSH 7.2
(key) ssh-rsa (2048-bit)                    -- [fail] using broken SHA-1 hash algorithm
                                            `- [warn] 2048-bit modulus only provides 112-bits of symmetric strength
                                            `- [info] available since OpenSSH 2.5.0, Dropbear SSH 0.28
                                            `- [info] deprecated in OpenSSH 8.8: https://www.openssh.com/txt/release-8.8
(key) ecdsa-sha2-nistp256                   -- [fail] using elliptic curves that are suspected as being backdoored by the U.S. National Security Agency
                                            `- [warn] using weak random number generator could reveal the key
                                            `- [info] available since OpenSSH 5.7, Dropbear SSH 2013.62
(key) ssh-ed25519                           -- [info] available since OpenSSH 6.5

# encryption algorithms (ciphers)
(enc) chacha20-poly1305@openssh.com         -- [info] available since OpenSSH 6.5
                                            `- [info] default cipher since OpenSSH 6.9
(enc) aes128-ctr                            -- [info] available since OpenSSH 3.7, Dropbear SSH 0.52
(enc) aes192-ctr                            -- [info] available since OpenSSH 3.7
(enc) aes256-ctr                            -- [info] available since OpenSSH 3.7, Dropbear SSH 0.52
(enc) aes128-gcm@openssh.com                -- [info] available since OpenSSH 6.2
(enc) aes256-gcm@openssh.com                -- [info] available since OpenSSH 6.2

# message authentication code algorithms
(mac) umac-64-etm@openssh.com               -- [warn] using small 64-bit tag size
                                            `- [info] available since OpenSSH 6.2
(mac) umac-128-etm@openssh.com              -- [info] available since OpenSSH 6.2
(mac) hmac-sha2-256-etm@openssh.com         -- [info] available since OpenSSH 6.2
(mac) hmac-sha2-512-etm@openssh.com         -- [info] available since OpenSSH 6.2
(mac) hmac-sha1-etm@openssh.com             -- [fail] using broken SHA-1 hash algorithm
                                            `- [info] available since OpenSSH 6.2
(mac) umac-64@openssh.com                   -- [warn] using encrypt-and-MAC mode
                                            `- [warn] using small 64-bit tag size
                                            `- [info] available since OpenSSH 4.7
(mac) umac-128@openssh.com                  -- [warn] using encrypt-and-MAC mode
                                            `- [info] available since OpenSSH 6.2
(mac) hmac-sha2-256                         -- [warn] using encrypt-and-MAC mode
                                            `- [info] available since OpenSSH 5.9, Dropbear SSH 2013.56
(mac) hmac-sha2-512                         -- [warn] using encrypt-and-MAC mode
                                            `- [info] available since OpenSSH 5.9, Dropbear SSH 2013.56
(mac) hmac-sha1                             -- [fail] using broken SHA-1 hash algorithm
                                            `- [warn] using encrypt-and-MAC mode
                                            `- [info] available since OpenSSH 2.1.0, Dropbear SSH 0.28

# fingerprints
(fin) ssh-ed25519: SHA256:vwCCSg+OuRwAflHQs/+Y22UJ7p2lM57vbukGFt5AAaY
(fin) ssh-rsa: SHA256:o+WUM9bAmH2G5xMAsJfZRsmh8hvMoU4dx9gdmahLM+M

# algorithm recommendations (for OpenSSH 8.4)
(rec) -ecdh-sha2-nistp256                   -- kex algorithm to remove 
(rec) -ecdh-sha2-nistp384                   -- kex algorithm to remove 
(rec) -ecdh-sha2-nistp521                   -- kex algorithm to remove 
(rec) -ecdsa-sha2-nistp256                  -- key algorithm to remove 
(rec) -hmac-sha1                            -- mac algorithm to remove 
(rec) -hmac-sha1-etm@openssh.com            -- mac algorithm to remove 
(rec) -ssh-rsa                              -- key algorithm to remove 
(rec) !rsa-sha2-256                         -- key algorithm to change (increase modulus size to 3072 bits or larger) 
(rec) !rsa-sha2-512                         -- key algorithm to change (increase modulus size to 3072 bits or larger) 
(rec) -diffie-hellman-group14-sha256        -- kex algorithm to remove 
(rec) -hmac-sha2-256                        -- mac algorithm to remove 
(rec) -hmac-sha2-512                        -- mac algorithm to remove 
(rec) -umac-128@openssh.com                 -- mac algorithm to remove 
(rec) -umac-64-etm@openssh.com              -- mac algorithm to remove 
(rec) -umac-64@openssh.com                  -- mac algorithm to remove 

# additional info
(nfo) For hardening guides on common OSes, please see: <https://www.ssh-audit.com/hardening_guides.html>
(nfo) Be aware that, while this target properly supports the strict key exchange method (via the kex-strict-?-v00@openssh.com marker) needed to protect against the Terrapin vulnerability (CVE-2023-48795), all peers must also support this feature as well, otherwise the vulnerability will still be present.  The following algorithms would allow an unpatched peer to create vulnerable SSH channels with this target: chacha20-poly1305@openssh.com.  If any CBC ciphers are in this list, you may remove them while leaving the *-etm@openssh.com MACs in place; these MACs are fine while paired with non-CBC cipher types.

Joar, das sieht tatsächlich nicht ganz so optimal aus. Ein Hinweis darauf ist also nicht unberechtigt. Ich habe dem Finder also freundlich und dankbar geantwortet, aber auch darauf hingewiesen, dass das System nicht zu meiner Infrastruktur gehört. Zusätzlich habe ich ihm die relevanten Whois-Informationen zur IPv4 des angegebenen Hosts mitgeschickt.

Seine Antwort hat nicht lange auf sich warten lassen:

Thank you for your answer.

Let me know if you need anything else from myside

I hope this type of hard efforts deserves something reward

Hm… „hard efforts“. Ich will das jetzt nicht schlechtreden. Wäre der Hinweis im beruflichen Umfeld angekommen, hätte ich mich vielleicht sogar für eine Kleinigkeit stark gemacht. Aber da es hier nur um meine private Infrastruktur geht – und dann noch mit dem JavaScript-Hinweis und der Meldung zu einem fremden System – wirkt das Ganze doch etwas oberflächlich. Also habe ich ihn freundlich darauf hingewiesen.

Mein Tipp für den Umgang mit solchen Meldungen

Wenn euch mal eine solche Nachricht erreicht: Schnell und freundlich reagieren! Den Report ernst nehmen, bewerten und eine angemessene Rückmeldung geben. Die Mühe des Finders sollte wertgeschätzt werden. Zwei Wochen später mit „Anzeige ist raus!“ zu antworten, wäre der falsche Weg. Denn ganz ehrlich: Es ist für jemanden deutlich aufwendiger, sich die Mühe zu machen, eine Meldung zu schreiben, als einfach das Ganze in ein passendes Darknet-Forum zu posten und dort ein paar XMR oder Bitcoin einzusammeln.

Macht es den Leuten also möglichst einfach, euch zu kontaktieren. Eine security.txt oder klare Kontaktinformationen für eine Security-Mailbox helfen ungemein. Hauptsache, jemand kann seinen Report unkompliziert abgeben – und er wird von jemandem gelesen, der das Ganze bewerten kann.

Hier noch etwas zum klicken für die security.txt:
https://securitytxt.org/
https://de.wikipedia.org/wiki/Security.txt
https://www.allianz-fuer-cybersicherheit.de/Webs/ACS/DE/Home/_/infos/20240430_securitytxt.html

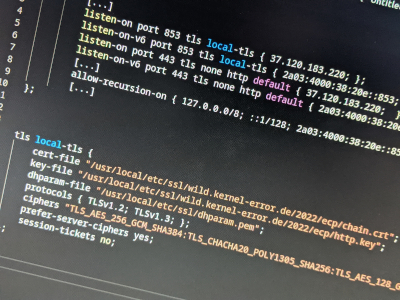
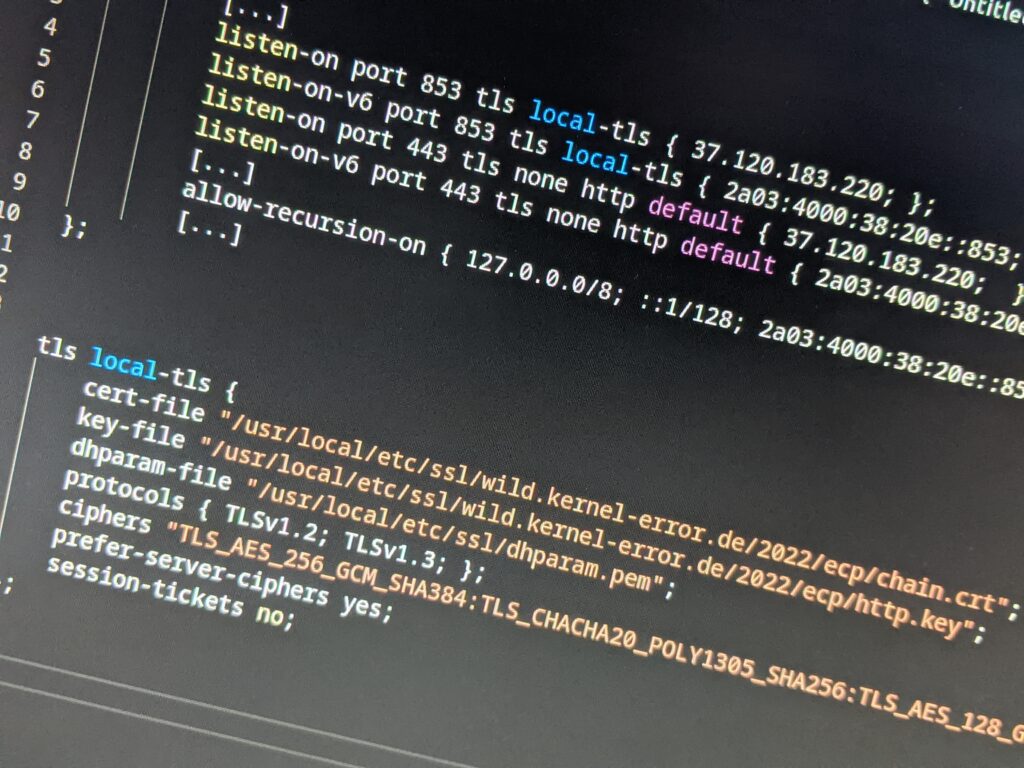
Meine SSH Konfiguration sieht von außen wie folgt aus:

Plain text
Copy to clipboard
Open code in new window
EnlighterJS 3 Syntax Highlighter
# general
(gen) banner: SSH-2.0-OpenSSH_9.7 DemMeisterSeinRennAuto
(gen) software: OpenSSH 9.7
(gen) compatibility: OpenSSH 8.5+, Dropbear SSH 2018.76+
(gen) compression: enabled (zlib@openssh.com)
# key exchange algorithms
(kex) sntrup761x25519-sha512@openssh.com -- [info] available since OpenSSH 8.5
(kex) curve25519-sha256 -- [info] available since OpenSSH 7.4, Dropbear SSH 2018.76
`- [info] default key exchange since OpenSSH 6.4
(kex) curve25519-sha256@libssh.org -- [info] available since OpenSSH 6.4, Dropbear SSH 2013.62
`- [info] default key exchange since OpenSSH 6.4
(kex) diffie-hellman-group16-sha512 -- [info] available since OpenSSH 7.3, Dropbear SSH 2016.73
(kex) diffie-hellman-group18-sha512 -- [info] available since OpenSSH 7.3
(kex) diffie-hellman-group-exchange-sha256 (3072-bit) -- [info] available since OpenSSH 4.4
`- [info] OpenSSH's GEX fallback mechanism was triggered during testing. Very old SSH clients will still be able to create connections using a 2048-bit modulus, though modern clients will use 3072. This can only be disabled by recompiling the code (see https://github.com/openssh/openssh-portable/blob/V_9_4/dh.c#L477).
(kex) ext-info-s -- [info] pseudo-algorithm that denotes the peer supports RFC8308 extensions
(kex) kex-strict-s-v00@openssh.com -- [info] pseudo-algorithm that denotes the peer supports a stricter key exchange method as a counter-measure to the Terrapin attack (CVE-2023-48795)
# host-key algorithms
(key) ssh-ed25519 -- [info] available since OpenSSH 6.5
# encryption algorithms (ciphers)
(enc) aes256-gcm@openssh.com -- [info] available since OpenSSH 6.2
(enc) aes128-gcm@openssh.com -- [info] available since OpenSSH 6.2
(enc) aes256-ctr -- [info] available since OpenSSH 3.7, Dropbear SSH 0.52
(enc) aes192-ctr -- [info] available since OpenSSH 3.7
(enc) aes128-ctr -- [info] available since OpenSSH 3.7, Dropbear SSH 0.52
# message authentication code algorithms
(mac) hmac-sha2-256-etm@openssh.com -- [info] available since OpenSSH 6.2
(mac) hmac-sha2-512-etm@openssh.com -- [info] available since OpenSSH 6.2
(mac) umac-128-etm@openssh.com -- [info] available since OpenSSH 6.2
# fingerprints
(fin) ssh-ed25519: SHA256:kPRXNCMRLiHfvJunW2CbW5H3NZmn3Wkx2KnHJXl1aLc
# algorithm recommendations (for OpenSSH 9.7)
(rec) +rsa-sha2-256 -- key algorithm to append
(rec) +rsa-sha2-512 -- key algorithm to append
# general (gen) banner: SSH-2.0-OpenSSH_9.7 DemMeisterSeinRennAuto (gen) software: OpenSSH 9.7 (gen) compatibility: OpenSSH 8.5+, Dropbear SSH 2018.76+ (gen) compression: enabled (zlib@openssh.com) # key exchange algorithms (kex) sntrup761x25519-sha512@openssh.com -- [info] available since OpenSSH 8.5 (kex) curve25519-sha256 -- [info] available since OpenSSH 7.4, Dropbear SSH 2018.76 `- [info] default key exchange since OpenSSH 6.4 (kex) curve25519-sha256@libssh.org -- [info] available since OpenSSH 6.4, Dropbear SSH 2013.62 `- [info] default key exchange since OpenSSH 6.4 (kex) diffie-hellman-group16-sha512 -- [info] available since OpenSSH 7.3, Dropbear SSH 2016.73 (kex) diffie-hellman-group18-sha512 -- [info] available since OpenSSH 7.3 (kex) diffie-hellman-group-exchange-sha256 (3072-bit) -- [info] available since OpenSSH 4.4 `- [info] OpenSSH's GEX fallback mechanism was triggered during testing. Very old SSH clients will still be able to create connections using a 2048-bit modulus, though modern clients will use 3072. This can only be disabled by recompiling the code (see https://github.com/openssh/openssh-portable/blob/V_9_4/dh.c#L477). (kex) ext-info-s -- [info] pseudo-algorithm that denotes the peer supports RFC8308 extensions (kex) kex-strict-s-v00@openssh.com -- [info] pseudo-algorithm that denotes the peer supports a stricter key exchange method as a counter-measure to the Terrapin attack (CVE-2023-48795) # host-key algorithms (key) ssh-ed25519 -- [info] available since OpenSSH 6.5 # encryption algorithms (ciphers) (enc) aes256-gcm@openssh.com -- [info] available since OpenSSH 6.2 (enc) aes128-gcm@openssh.com -- [info] available since OpenSSH 6.2 (enc) aes256-ctr -- [info] available since OpenSSH 3.7, Dropbear SSH 0.52 (enc) aes192-ctr -- [info] available since OpenSSH 3.7 (enc) aes128-ctr -- [info] available since OpenSSH 3.7, Dropbear SSH 0.52 # message authentication code algorithms (mac) hmac-sha2-256-etm@openssh.com -- [info] available since OpenSSH 6.2 (mac) hmac-sha2-512-etm@openssh.com -- [info] available since OpenSSH 6.2 (mac) umac-128-etm@openssh.com -- [info] available since OpenSSH 6.2 # fingerprints (fin) ssh-ed25519: SHA256:kPRXNCMRLiHfvJunW2CbW5H3NZmn3Wkx2KnHJXl1aLc # algorithm recommendations (for OpenSSH 9.7) (rec) +rsa-sha2-256 -- key algorithm to append (rec) +rsa-sha2-512 -- key algorithm to append
# general
(gen) banner: SSH-2.0-OpenSSH_9.7 DemMeisterSeinRennAuto
(gen) software: OpenSSH 9.7
(gen) compatibility: OpenSSH 8.5+, Dropbear SSH 2018.76+
(gen) compression: enabled (zlib@openssh.com)

# key exchange algorithms
(kex) sntrup761x25519-sha512@openssh.com    -- [info] available since OpenSSH 8.5
(kex) curve25519-sha256                     -- [info] available since OpenSSH 7.4, Dropbear SSH 2018.76
                                            `- [info] default key exchange since OpenSSH 6.4
(kex) curve25519-sha256@libssh.org          -- [info] available since OpenSSH 6.4, Dropbear SSH 2013.62
                                            `- [info] default key exchange since OpenSSH 6.4
(kex) diffie-hellman-group16-sha512         -- [info] available since OpenSSH 7.3, Dropbear SSH 2016.73
(kex) diffie-hellman-group18-sha512         -- [info] available since OpenSSH 7.3
(kex) diffie-hellman-group-exchange-sha256 (3072-bit) -- [info] available since OpenSSH 4.4
                                                      `- [info] OpenSSH's GEX fallback mechanism was triggered during testing. Very old SSH clients will still be able to create connections using a 2048-bit modulus, though modern clients will use 3072. This can only be disabled by recompiling the code (see https://github.com/openssh/openssh-portable/blob/V_9_4/dh.c#L477).
(kex) ext-info-s                            -- [info] pseudo-algorithm that denotes the peer supports RFC8308 extensions
(kex) kex-strict-s-v00@openssh.com          -- [info] pseudo-algorithm that denotes the peer supports a stricter key exchange method as a counter-measure to the Terrapin attack (CVE-2023-48795)

# host-key algorithms
(key) ssh-ed25519                           -- [info] available since OpenSSH 6.5

# encryption algorithms (ciphers)
(enc) aes256-gcm@openssh.com                -- [info] available since OpenSSH 6.2
(enc) aes128-gcm@openssh.com                -- [info] available since OpenSSH 6.2
(enc) aes256-ctr                            -- [info] available since OpenSSH 3.7, Dropbear SSH 0.52
(enc) aes192-ctr                            -- [info] available since OpenSSH 3.7
(enc) aes128-ctr                            -- [info] available since OpenSSH 3.7, Dropbear SSH 0.52

# message authentication code algorithms
(mac) hmac-sha2-256-etm@openssh.com         -- [info] available since OpenSSH 6.2
(mac) hmac-sha2-512-etm@openssh.com         -- [info] available since OpenSSH 6.2
(mac) umac-128-etm@openssh.com              -- [info] available since OpenSSH 6.2

# fingerprints
(fin) ssh-ed25519: SHA256:kPRXNCMRLiHfvJunW2CbW5H3NZmn3Wkx2KnHJXl1aLc

# algorithm recommendations (for OpenSSH 9.7)
(rec) +rsa-sha2-256                         -- key algorithm to append 
(rec) +rsa-sha2-512                         -- key algorithm to append 

GeoGuessr im Cyber-Sicherheitskontext: Wie IP-Kameras zum Risiko werden können

Die meisten von euch werden das Spiel GeoGuessr kennen. Man bekommt ein Google-Street-View-Bild gezeigt, kann sich vielleicht noch ein paar Meter hin- und herbewegen und muss dann auf einer Weltkarte einen Marker setzen, wo man meint, dass dieses Bild aufgenommen wurde. Wer dem Punkt am nächsten kommt, gewinnt.

Eine etwas abgewandelte Version begegnet mir immer mal wieder, wenn ich mich an einem Bug-Bounty-Programm beteilige oder einfach mit offenen Augen durchs Internet spaziere. Damit ist natürlich kein aktives Port-Scanning auf Netzblöcke oder Ähnliches gemeint.

Worum geht es genau?

In den letzten Jahren verbreiten sich immer mehr billige „China-Kameras“ bei Heimanwendern, aber auch bei Unternehmen. Dagegen spricht erst einmal nichts.

Was leider oft übersehen wird, sind die kleinen automatischen Helferlein, die die Einrichtung und den Betrieb einer solchen Kamera möglichst einfach machen sollen. UPnP (Universal Plug and Play) haben manche vielleicht schon mal im Zusammenhang mit Windows 95 oder USB gehört (ja, ich bin alt …). So etwas gibt es aber auch für Router und Firewalls, also für Netzwerke. Bei einer Fritzbox nennt sich das beispielsweise „Automatische Portfreigabe“.

Der eine oder andere ahnt jetzt sicher schon etwas: Es gibt IP-Kameras, die sich so – vielleicht sogar ohne das Wissen des Betreibers – selbst über das Internet erreichbar machen. Das betrifft nicht selten die komplette Weboberfläche. Mal ist diese kennwortgeschützt, mal nicht.

Sehr oft findet sich auch nur der RTSP-Port (Real Time Streaming Protocol) offen im Internet. Per RTSP werfen solche Kameras oft einen einfachen Videostream aus, der die Anbindung an zentrale Videoüberwachungssysteme erlaubt. Auch RTSP-Streams lassen sich mit einer Anmeldung schützen, was aber scheinbar in der Regel werkseitig deaktiviert ist.

Wenn dieser Port offen ist, könnte man sich einfach per ffplay einen solchen Stream anschauen:

Plain text
Copy to clipboard
Open code in new window
EnlighterJS 3 Syntax Highlighter
ffplay rtsp://1.2.3.4/11

Wenn man sich nicht sicher ist, wie die korrekte RTSP-URL für die jeweilige IP-Kamera lautet, kann nmap zusammen mit dem Script rtsp-url-brute helfen:

Plain text
Copy to clipboard
Open code in new window
EnlighterJS 3 Syntax Highlighter
nmap --script rtsp-url-brute -p 554 1.2.3.4

Die rechtliche Lage

Nun kann es natürlich rechtlich schwierig sein, bei einer fremden IP-Adresse nach dem offenen Port 554/TCP zu suchen, dort per nmap nach einer nutzbaren RTSP-URL zu scannen und sich den Stream dann live per ffplay, nmap oder vlc anzuschauen. Schließlich hat man nicht das Einverständnis des Betreibers.

Screenshot of shodan search engine, filtering for RTSP Streams.

Natürlich hält das wohl weniger Menschen ab, die ohnehin Schlechtes im Sinn haben. Ebenfalls gibt es verschiedene Dienste, die 24/7 nichts anderes tun. Ein Beispiel ist hier vielleicht shodan.io – dort lässt sich direkt nach solchen Vorschaubildern filtern, ohne dass man selbst eine Verbindung zu betroffenen IPs aufnehmen muss.

Warum ist das alles überhaupt problematisch?

Hat ein Angreifer Böses im Sinn, ist ein Zugriff auf die Überwachungskamera sehr hilfreich. Man kommt so möglicherweise an Insiderinformationen, findet heraus, wo wertvolle Dinge gelagert werden, wann und wie die Öffnungszeiten sind oder sogar mögliche Zugangscodes und Kennwörter. Natürlich auch, welche Kunden sich zu welcher Zeit dort aufhalten usw.

Denkt man an eine Arztpraxis, kann das schnell eine echte Datenschutzkatastrophe werden. Wenn die Kamera im Wohnzimmer oder Schlafzimmer einer Wohnung steht, führt das ebenfalls schnell zu ungewollten Einblicken.

Wenn man einmal außer Acht lässt, dass niemand gerne ohne sein Wissen per Livestream im Internet zu sehen ist, halte ich das Thema Datenschutz für eines der größten Risiken.

In der Vergangenheit sind mir bereits Beispiele begegnet, die das Problem verdeutlichen: Arztpraxen mit Kamerablick von hinten auf die Anmeldung – inklusive direktem Blick auf Patienten, Monitore mit Patientendaten oder Vertragsabschlüsse bei Mobilfunkanbietern. Auch Überwachungskameras in DHL-Filialen, die Bild und Ton in Zoom und 4K aufzeichnen, habe ich gesehen.

Für private Betreiber kann es ebenfalls schnell zu einem Datenschutzproblem werden. Nicht jeder achtet beim eingestellten Bildausschnitt der Kamera darauf, die Vorgaben des Datenschutzes einzuhalten. So werden oft mehr öffentliche Bereiche oder sogar Nachbargrundstücke gefilmt, als zulässig ist.

Wenn diese Daten dann auch noch ohne Schutz und Hürden in die Hände Dritter geraten, wird es heikel. Hier sollte besser jemand mit rechtlichem Hintergrund eine Einschätzung abgeben. Für mich klingt das alles jedenfalls ziemlich unschön.

Was kann man tun?

Eine Abuse-Mail an den jeweiligen ISP (Internet Service Provider) schicken, mit der Bitte, ihre Kunden zu informieren? Kann man machen. Bei kleineren ISPs klappt das oft sogar, und die Betreiber werden informiert. Spricht man aber über einen großen ISP wie die Telekom, verschwinden einzelne Abuse-Mails gefühlt einfach im Nichts.

Sonst jemanden zu finden, der ein Interesse daran hat, den meist unwissenden Betreiber zu informieren, ist nahezu unmöglich. Weder unsere Behörden noch das BSI interessieren sich dafür. Möchte man also den Betreiber darauf hinweisen, bleibt realistisch nur die Möglichkeit, ihn selbst zu kontaktieren.

GeoGuessr in der Praxis

Jetzt sind wir beim Thema GeoGuessr: Man hat also nur das Bild der Kamera, die IP-Adresse mit einer recht groben und nicht immer stimmigen Geolokalisierung und vielleicht noch ein paar weitere Rahmeninfos oder Dienste auf dieser IP-Adresse. Hin und wieder macht es mir daher sogar Spaß, den eigentlichen Betreiber ausfindig zu machen und ihm per E-Mail oder telefonisch kurz auf diesen möglichen Missstand hinzuweisen.

Wenn du das also gerade liest, weil ich dich darauf hingewiesen habe, weißt du jetzt, warum 😀

Natürlich trifft man oft auf Unverständnis – oder das klassisch deutsche „Anzeige ist raus!“ begegnet einem immer mal wieder. Es bietet also auch eine gute Möglichkeit, die eigenen Kommunikationsskills zu erweitern.

Dual Boot mit Linux und Windows: BitLocker für die Systemplatte auf Passwort umstellen

Die Feiertage sind da, und ich hatte tatsächlich etwas Zeit zum Zocken. Früher hatte ich dafür einen eigenen Rechner, heute reicht ein Dual Boot. Gearbeitet wird unter Linux, gezockt unter Windows. Dafür habe ich mein Windows auf einer gesonderten SSD installiert. Natürlich ist diese ebenfalls verschlüsselt, in diesem Fall mit BitLocker.

Illustration eines Dual-Boot-Systems mit Linux und Windows, dargestellt durch die Logos beider Betriebssysteme. Die Windows-Seite zeigt ein BitLocker-Schloss-Symbol, das auf die Verschlüsselung der Systemplatte hinweist.

Warum erzähle ich das? Na, weil die SSD irgendwann aufgegeben hat und ich mein Windows neu installieren darf. Ein Backup spare ich mir, da es eh nur zum Zocken ist.

Windows 11 war „schnell“ wieder installiert. Dann noch alle Treiber usw. – Gott, ist das noch immer alles aufwendig… Wie auch immer: Windows 11 und die Games sind drauf. Los geht’s!

Nun fragt mich mein BitLocker bei jedem Start der Betriebssystemfestplatte nach dem BitLocker-Wiederherstellungsschlüssel, wenn ich vorher in meinem Linux war. Da zuckt so eine Erinnerung durch mein Hirn: Das gleiche hatte ich schon mal, am gleichen Rechner. Wie hatte ich das damals gelöst? Ich habe nichts darüber geschrieben, also ist es einfach weg. Diesen Fehler mache ich nicht noch mal. Also liest du gerade etwas darüber. 😄

Der Ausgangspunkt: Ein Windows 11 Pro, installiert auf einer SSD, inkl. BitLocker-Verschlüsselung und TPM mit PIN. Warum PIN? Ich fühle mich einfach besser, wenn es noch eine manuelle Hürde zur Entschlüsselung gibt; Ist auch egal, soll ja nun weg.

Terminal als Administrator ausführen und dann:

Plain text
Copy to clipboard
Open code in new window
EnlighterJS 3 Syntax Highlighter
C:\Windows\System32> manage-bde -status
BitLocker-Laufwerkverschlüsselung: Konfigurationstool, Version 10.0.26100
Copyright (C) 2013 Microsoft Corporation. Alle Rechte vorbehalten.
Datenträgervolumes, die mit BitLocker-Laufwerkverschlüsselung
geschützt werden können:
Volume "C:" [System]
[Betriebssystemvolume]
Größe: 465,00 GB
BitLocker-Version: 2.0
Konvertierungsstatus: Nur verwendeter Speicherplatz ist verschlüsselt
Verschlüsselt (Prozent): 100,0 %
Verschlüsselungsmethode: XTS-AES 128
Schutzstatus: Der Schutz ist aktiviert.
Sperrungsstatus: Entsperrt
ID-Feld: Unbekannt
Schlüsselschutzvorrichtungen:
Numerisches Kennwort
TPM und PIN
TPM
C:\Windows\System32>
C:\Windows\System32> manage-bde -status BitLocker-Laufwerkverschlüsselung: Konfigurationstool, Version 10.0.26100 Copyright (C) 2013 Microsoft Corporation. Alle Rechte vorbehalten. Datenträgervolumes, die mit BitLocker-Laufwerkverschlüsselung geschützt werden können: Volume "C:" [System] [Betriebssystemvolume] Größe: 465,00 GB BitLocker-Version: 2.0 Konvertierungsstatus: Nur verwendeter Speicherplatz ist verschlüsselt Verschlüsselt (Prozent): 100,0 % Verschlüsselungsmethode: XTS-AES 128 Schutzstatus: Der Schutz ist aktiviert. Sperrungsstatus: Entsperrt ID-Feld: Unbekannt Schlüsselschutzvorrichtungen: Numerisches Kennwort TPM und PIN TPM C:\Windows\System32>
C:\Windows\System32> manage-bde -status
BitLocker-Laufwerkverschlüsselung: Konfigurationstool, Version 10.0.26100
Copyright (C) 2013 Microsoft Corporation. Alle Rechte vorbehalten.

Datenträgervolumes, die mit BitLocker-Laufwerkverschlüsselung
geschützt werden können:
Volume "C:" [System]
[Betriebssystemvolume]

    Größe:                        465,00 GB
    BitLocker-Version:            2.0
    Konvertierungsstatus:         Nur verwendeter Speicherplatz ist verschlüsselt
    Verschlüsselt (Prozent):      100,0 %
    Verschlüsselungsmethode:      XTS-AES 128
    Schutzstatus:                 Der Schutz ist aktiviert.
    Sperrungsstatus:              Entsperrt
    ID-Feld:                      Unbekannt
    Schlüsselschutzvorrichtungen:
        Numerisches Kennwort
        TPM und PIN
        TPM
C:\Windows\System32>

Schlüsselschutzvorrichtungen sind also numerisches Kennwort, TPM und PIN, sowie TPM. Was fehlt? Richtig, das Password. Da ich nur das Password möchte, kann im Grunde alles weg. Damit Windows 11 mir erlaubt, TPM von meinem Betriebssystemvolume zu entfernen, muss ich vorher noch eine Gruppenrichtlinie anpassen.

Dafür einfach die Tastenkombination Win + S drücken und nach Gruppenrichtlinie bearbeiten suchen.

Editor für lokale Gruppenrichtlinien mit geöffneter Einstellung 'Zusätzliche Authentifizierung beim Start anfordern' unter 'Computerkonfiguration > Administrative Vorlagen > BitLocker-Laufwerkverschlüsselung > Betriebssystemlaufwerke'. Die Option ist aktiviert, um die BitLocker-Verschlüsselung ohne TPM zu ermöglichen.
Detailansicht der Gruppenrichtlinieneinstellung 'Zusätzliche Authentifizierung beim Start anfordern'. Die Option 'BitLocker ohne kompatibles TPM zulassen' ist aktiviert, und die Konfiguration für TPM-Start, Systemstartschlüssel und PIN wird angezeigt. Die Beschreibung auf der rechten Seite erläutert die Auswirkungen der Richtlinie.

Dann zu:
ComputerkonfigurationAdministrative VorlagenBitLocker-LaufwerkverschlüsselungBetriebssystemlaufwerkeZusätzliche Authentifizierung beim Start anfordern.

Hier die Einstellung so ändern, dass der Haken bei „BitLocker ohne kompatibles TPM zulassen“ gesetzt ist.

Im Anschluss sicherstellen, dass die neue Gruppenrichtlinie auch angewendet wird. Dazu im Administrator-Terminal einfach ein kurzes:

Plain text
Copy to clipboard
Open code in new window
EnlighterJS 3 Syntax Highlighter
PS C:\WINDOWS\system32> gpupdate /force
Die Richtlinie wird aktualisiert...
Die Aktualisierung der Computerrichtlinie wurde erfolgreich abgeschlossen.
Die Aktualisierung der Benutzerrichtlinie wurde erfolgreich abgeschlossen.
PS C:\WINDOWS\system32>
PS C:\WINDOWS\system32> gpupdate /force Die Richtlinie wird aktualisiert... Die Aktualisierung der Computerrichtlinie wurde erfolgreich abgeschlossen. Die Aktualisierung der Benutzerrichtlinie wurde erfolgreich abgeschlossen. PS C:\WINDOWS\system32>
PS C:\WINDOWS\system32> gpupdate /force
Die Richtlinie wird aktualisiert...

Die Aktualisierung der Computerrichtlinie wurde erfolgreich abgeschlossen.
Die Aktualisierung der Benutzerrichtlinie wurde erfolgreich abgeschlossen.

PS C:\WINDOWS\system32>

So, jetzt wird’s spannend. Erstmal alle Schlüsselschutzvorrichtungen deaktivieren, dann löschen, die neue Schlüsselschutzvorrichtung Password hinzufügen und alles wieder aktivieren. Das Ganze natürlich im Administrator-Terminal. Ich starte damit, alle Schlüsselschutzvorrichtungen zu deaktivieren:

Plain text
Copy to clipboard
Open code in new window
EnlighterJS 3 Syntax Highlighter
C:\Windows\System32>manage-bde -protectors -disable C:
BitLocker-Laufwerkverschlüsselung: Konfigurationstool, Version 10.0.26100
Copyright (C) 2013 Microsoft Corporation. Alle Rechte vorbehalten.
Die Schlüsselschutzvorrichtungen für Volume "C:" sind deaktiviert.
C:\Windows\System32>manage-bde -protectors -disable C: BitLocker-Laufwerkverschlüsselung: Konfigurationstool, Version 10.0.26100 Copyright (C) 2013 Microsoft Corporation. Alle Rechte vorbehalten. Die Schlüsselschutzvorrichtungen für Volume "C:" sind deaktiviert.
C:\Windows\System32>manage-bde -protectors -disable C:
BitLocker-Laufwerkverschlüsselung: Konfigurationstool, Version 10.0.26100
Copyright (C) 2013 Microsoft Corporation. Alle Rechte vorbehalten.

Die Schlüsselschutzvorrichtungen für Volume "C:" sind deaktiviert.

Als Nächstes schaue ich nach, welche Schlüsselschutzvorrichtungen auf meinem Betriebssystemvolume eingerichtet sind.

Plain text
Copy to clipboard
Open code in new window
EnlighterJS 3 Syntax Highlighter
C:\Windows\System32>manage-bde -protectors -get C:
BitLocker-Laufwerkverschlüsselung: Konfigurationstool, Version 10.0.26100
Copyright (C) 2013 Microsoft Corporation. Alle Rechte vorbehalten.
Volume "C:" [System]
Alle Schlüsselschutzvorrichtungen
Numerisches Kennwort:
ID: {AF6C0AAD-B337-4519-8D66-C06386994D97}
Kennwort:
673101-147301-650001-335379-291368-420618-438350-305327
Sicherungstyp:
In Datei gespeichert
TPM und PIN:
ID: {D5F87162-5556-4C27-82F9-25B389DBAF1B}
PCR-Validierungsprofil:
0, 2, 4, 11
TPM:
ID: {CA1BF147-2C40-4934-9161-660FBB44BA2C}
PCR-Validierungsprofil:
0, 2, 4, 11
C:\Windows\System32>manage-bde -protectors -get C: BitLocker-Laufwerkverschlüsselung: Konfigurationstool, Version 10.0.26100 Copyright (C) 2013 Microsoft Corporation. Alle Rechte vorbehalten. Volume "C:" [System] Alle Schlüsselschutzvorrichtungen Numerisches Kennwort: ID: {AF6C0AAD-B337-4519-8D66-C06386994D97} Kennwort: 673101-147301-650001-335379-291368-420618-438350-305327 Sicherungstyp: In Datei gespeichert TPM und PIN: ID: {D5F87162-5556-4C27-82F9-25B389DBAF1B} PCR-Validierungsprofil: 0, 2, 4, 11 TPM: ID: {CA1BF147-2C40-4934-9161-660FBB44BA2C} PCR-Validierungsprofil: 0, 2, 4, 11
C:\Windows\System32>manage-bde -protectors -get C:
BitLocker-Laufwerkverschlüsselung: Konfigurationstool, Version 10.0.26100
Copyright (C) 2013 Microsoft Corporation. Alle Rechte vorbehalten.

Volume "C:" [System]
Alle Schlüsselschutzvorrichtungen

    Numerisches Kennwort:
      ID: {AF6C0AAD-B337-4519-8D66-C06386994D97}
      Kennwort:
        673101-147301-650001-335379-291368-420618-438350-305327
      Sicherungstyp:
        In Datei gespeichert

    TPM und PIN:
      ID: {D5F87162-5556-4C27-82F9-25B389DBAF1B}
      PCR-Validierungsprofil:
        0, 2, 4, 11

    TPM:
      ID: {CA1BF147-2C40-4934-9161-660FBB44BA2C}
      PCR-Validierungsprofil:
        0, 2, 4, 11

Jetzt lösche ich alle Schlüsselschutzvorrichtungen anhand ihrer IDs:

Plain text
Copy to clipboard
Open code in new window
EnlighterJS 3 Syntax Highlighter
C:\Windows\System32>manage-bde -protectors -delete C: -id {D5F87162-5556-4C27-82F9-25B389DBAF1B}
BitLocker-Laufwerkverschlüsselung: Konfigurationstool, Version 10.0.26100
Copyright (C) 2013 Microsoft Corporation. Alle Rechte vorbehalten.
Volume "C:" [System]
Schlüsselschutzvorrichtung mit ID {D5F87162-5556-4C27-82F9-25B389DBAF1B}
TPM und PIN:
ID: {D5F87162-5556-4C27-82F9-25B389DBAF1B}
PCR-Validierungsprofil:
0, 2, 4, 11
Die Schlüsselschutzvorrichtung mit der ID "{D5F87162-5556-4C27-82F9-25B389DBAF1B}" wurde gelöscht.
C:\Windows\System32>manage-bde -protectors -delete C: -id {CA1BF147-2C40-4934-9161-660FBB44BA2C}
BitLocker-Laufwerkverschlüsselung: Konfigurationstool, Version 10.0.26100
Copyright (C) 2013 Microsoft Corporation. Alle Rechte vorbehalten.
Volume "C:" [System]
Schlüsselschutzvorrichtung mit ID {CA1BF147-2C40-4934-9161-660FBB44BA2C}
TPM:
ID: {CA1BF147-2C40-4934-9161-660FBB44BA2C}
PCR-Validierungsprofil:
0, 2, 4, 11
Die Schlüsselschutzvorrichtung mit der ID "{CA1BF147-2C40-4934-9161-660FBB44BA2C}" wurde gelöscht.
C:\Windows\System32>manage-bde -protectors -delete C: -id {AF6C0AAD-B337-4519-8D66-C06386994D97}
BitLocker-Laufwerkverschlüsselung: Konfigurationstool, Version 10.0.26100
Copyright (C) 2013 Microsoft Corporation. Alle Rechte vorbehalten.
Volume "C:" [System]
Schlüsselschutzvorrichtung mit ID {AF6C0AAD-B337-4519-8D66-C06386994D97}
Numerisches Kennwort:
ID: {AF6C0AAD-B337-4519-8D66-C06386994D97}
Kennwort:
673101-147301-650001-335379-291368-420618-438350-305327
Sicherungstyp:
In Datei gespeichert
Die Schlüsselschutzvorrichtung mit der ID "{AF6C0AAD-B337-4519-8D66-C06386994D97}" wurde gelöscht.
C:\Windows\System32>manage-bde -protectors -delete C: -id {D5F87162-5556-4C27-82F9-25B389DBAF1B} BitLocker-Laufwerkverschlüsselung: Konfigurationstool, Version 10.0.26100 Copyright (C) 2013 Microsoft Corporation. Alle Rechte vorbehalten. Volume "C:" [System] Schlüsselschutzvorrichtung mit ID {D5F87162-5556-4C27-82F9-25B389DBAF1B} TPM und PIN: ID: {D5F87162-5556-4C27-82F9-25B389DBAF1B} PCR-Validierungsprofil: 0, 2, 4, 11 Die Schlüsselschutzvorrichtung mit der ID "{D5F87162-5556-4C27-82F9-25B389DBAF1B}" wurde gelöscht. C:\Windows\System32>manage-bde -protectors -delete C: -id {CA1BF147-2C40-4934-9161-660FBB44BA2C} BitLocker-Laufwerkverschlüsselung: Konfigurationstool, Version 10.0.26100 Copyright (C) 2013 Microsoft Corporation. Alle Rechte vorbehalten. Volume "C:" [System] Schlüsselschutzvorrichtung mit ID {CA1BF147-2C40-4934-9161-660FBB44BA2C} TPM: ID: {CA1BF147-2C40-4934-9161-660FBB44BA2C} PCR-Validierungsprofil: 0, 2, 4, 11 Die Schlüsselschutzvorrichtung mit der ID "{CA1BF147-2C40-4934-9161-660FBB44BA2C}" wurde gelöscht. C:\Windows\System32>manage-bde -protectors -delete C: -id {AF6C0AAD-B337-4519-8D66-C06386994D97} BitLocker-Laufwerkverschlüsselung: Konfigurationstool, Version 10.0.26100 Copyright (C) 2013 Microsoft Corporation. Alle Rechte vorbehalten. Volume "C:" [System] Schlüsselschutzvorrichtung mit ID {AF6C0AAD-B337-4519-8D66-C06386994D97} Numerisches Kennwort: ID: {AF6C0AAD-B337-4519-8D66-C06386994D97} Kennwort: 673101-147301-650001-335379-291368-420618-438350-305327 Sicherungstyp: In Datei gespeichert Die Schlüsselschutzvorrichtung mit der ID "{AF6C0AAD-B337-4519-8D66-C06386994D97}" wurde gelöscht.
C:\Windows\System32>manage-bde -protectors -delete C: -id {D5F87162-5556-4C27-82F9-25B389DBAF1B}
BitLocker-Laufwerkverschlüsselung: Konfigurationstool, Version 10.0.26100
Copyright (C) 2013 Microsoft Corporation. Alle Rechte vorbehalten.

Volume "C:" [System]
Schlüsselschutzvorrichtung mit ID {D5F87162-5556-4C27-82F9-25B389DBAF1B}

    TPM und PIN:
      ID: {D5F87162-5556-4C27-82F9-25B389DBAF1B}
      PCR-Validierungsprofil:
        0, 2, 4, 11

Die Schlüsselschutzvorrichtung mit der ID "{D5F87162-5556-4C27-82F9-25B389DBAF1B}" wurde gelöscht.

C:\Windows\System32>manage-bde -protectors -delete C: -id {CA1BF147-2C40-4934-9161-660FBB44BA2C}
BitLocker-Laufwerkverschlüsselung: Konfigurationstool, Version 10.0.26100
Copyright (C) 2013 Microsoft Corporation. Alle Rechte vorbehalten.

Volume "C:" [System]
Schlüsselschutzvorrichtung mit ID {CA1BF147-2C40-4934-9161-660FBB44BA2C}

    TPM:
      ID: {CA1BF147-2C40-4934-9161-660FBB44BA2C}
      PCR-Validierungsprofil:
        0, 2, 4, 11

Die Schlüsselschutzvorrichtung mit der ID "{CA1BF147-2C40-4934-9161-660FBB44BA2C}" wurde gelöscht.

C:\Windows\System32>manage-bde -protectors -delete C: -id {AF6C0AAD-B337-4519-8D66-C06386994D97}
BitLocker-Laufwerkverschlüsselung: Konfigurationstool, Version 10.0.26100
Copyright (C) 2013 Microsoft Corporation. Alle Rechte vorbehalten.

Volume "C:" [System]
Schlüsselschutzvorrichtung mit ID {AF6C0AAD-B337-4519-8D66-C06386994D97}

    Numerisches Kennwort:
      ID: {AF6C0AAD-B337-4519-8D66-C06386994D97}
      Kennwort:
        673101-147301-650001-335379-291368-420618-438350-305327
      Sicherungstyp:
        In Datei gespeichert

Die Schlüsselschutzvorrichtung mit der ID "{AF6C0AAD-B337-4519-8D66-C06386994D97}" wurde gelöscht.

Wenn ich jetzt noch einmal kontrolliere, welche Schlüsselschutzvorrichtungen ich habe, sollten dort keine mehr stehen.

Plain text
Copy to clipboard
Open code in new window
EnlighterJS 3 Syntax Highlighter
C:\Windows\System32>manage-bde -protectors -get C:
BitLocker-Laufwerkverschlüsselung: Konfigurationstool, Version 10.0.26100
Copyright (C) 2013 Microsoft Corporation. Alle Rechte vorbehalten.
Volume "C:" [System]
Alle Schlüsselschutzvorrichtungen
FEHLER: Es wurden keine Schlüsselschutzvorrichtungen gefunden.
C:\Windows\System32>manage-bde -protectors -get C: BitLocker-Laufwerkverschlüsselung: Konfigurationstool, Version 10.0.26100 Copyright (C) 2013 Microsoft Corporation. Alle Rechte vorbehalten. Volume "C:" [System] Alle Schlüsselschutzvorrichtungen FEHLER: Es wurden keine Schlüsselschutzvorrichtungen gefunden.
C:\Windows\System32>manage-bde -protectors -get C:
BitLocker-Laufwerkverschlüsselung: Konfigurationstool, Version 10.0.26100
Copyright (C) 2013 Microsoft Corporation. Alle Rechte vorbehalten.

Volume "C:" [System]
Alle Schlüsselschutzvorrichtungen

FEHLER: Es wurden keine Schlüsselschutzvorrichtungen gefunden.

Damit kann ich jetzt meine neue, gewünschte Schlüsselschutzvorrichtung Passwort hinzufügen.

Plain text
Copy to clipboard
Open code in new window
EnlighterJS 3 Syntax Highlighter
C:\Windows\System32>manage-bde -protectors -add C: -password
BitLocker-Laufwerkverschlüsselung: Konfigurationstool, Version 10.0.26100
Copyright (C) 2013 Microsoft Corporation. Alle Rechte vorbehalten.
Geben Sie das Kennwort ein, das zum Schützen des Volumes verwendet werden soll:
Bestätigen Sie das Kennwort durch erneute Eingabe:
Hinzugefügte Schlüsselschutzvorrichtungen:
Kennwort:
ID: {4D141862-4C75-4321-AA6D-8BABB89C601C}
C:\Windows\System32>manage-bde -protectors -add C: -password BitLocker-Laufwerkverschlüsselung: Konfigurationstool, Version 10.0.26100 Copyright (C) 2013 Microsoft Corporation. Alle Rechte vorbehalten. Geben Sie das Kennwort ein, das zum Schützen des Volumes verwendet werden soll: Bestätigen Sie das Kennwort durch erneute Eingabe: Hinzugefügte Schlüsselschutzvorrichtungen: Kennwort: ID: {4D141862-4C75-4321-AA6D-8BABB89C601C}
C:\Windows\System32>manage-bde -protectors -add C: -password
BitLocker-Laufwerkverschlüsselung: Konfigurationstool, Version 10.0.26100
Copyright (C) 2013 Microsoft Corporation. Alle Rechte vorbehalten.

Geben Sie das Kennwort ein, das zum Schützen des Volumes verwendet werden soll:

Bestätigen Sie das Kennwort durch erneute Eingabe:

Hinzugefügte Schlüsselschutzvorrichtungen:

    Kennwort:
      ID: {4D141862-4C75-4321-AA6D-8BABB89C601C}

Bleibt nur noch, diese auch zu aktivieren.

Plain text
Copy to clipboard
Open code in new window
EnlighterJS 3 Syntax Highlighter
C:\Windows\System32>manage-bde -protectors -enable C:
BitLocker-Laufwerkverschlüsselung: Konfigurationstool, Version 10.0.26100
Copyright (C) 2013 Microsoft Corporation. Alle Rechte vorbehalten.
Die Schlüsselschutzvorrichtungen für Volume "C:" sind aktiviert.
C:\Windows\System32>manage-bde -protectors -enable C: BitLocker-Laufwerkverschlüsselung: Konfigurationstool, Version 10.0.26100 Copyright (C) 2013 Microsoft Corporation. Alle Rechte vorbehalten. Die Schlüsselschutzvorrichtungen für Volume "C:" sind aktiviert.
C:\Windows\System32>manage-bde -protectors -enable C:
BitLocker-Laufwerkverschlüsselung: Konfigurationstool, Version 10.0.26100
Copyright (C) 2013 Microsoft Corporation. Alle Rechte vorbehalten.

Die Schlüsselschutzvorrichtungen für Volume "C:" sind aktiviert.

Wenn ich jetzt den BitLocker-Status prüfe, ist alles aktiv, und es gibt nur noch die Schlüsselschutzvorrichtung Kennwort / Password!

Plain text
Copy to clipboard
Open code in new window
EnlighterJS 3 Syntax Highlighter
C:\Windows\System32>manage-bde -status
BitLocker-Laufwerkverschlüsselung: Konfigurationstool, Version 10.0.26100
Copyright (C) 2013 Microsoft Corporation. Alle Rechte vorbehalten.
Datenträgervolumes, die mit BitLocker-Laufwerkverschlüsselung
geschützt werden können:
Volume "C:" [System]
[Betriebssystemvolume]
Größe: 465,00 GB
BitLocker-Version: 2.0
Konvertierungsstatus: Nur verwendeter Speicherplatz ist verschlüsselt
Verschlüsselt (Prozent): 100,0 %
Verschlüsselungsmethode: XTS-AES 128
Schutzstatus: Der Schutz ist aktiviert.
Sperrungsstatus: Entsperrt
ID-Feld: Unbekannt
Schlüsselschutzvorrichtungen:
Kennwort
C:\Windows\System32>manage-bde -status BitLocker-Laufwerkverschlüsselung: Konfigurationstool, Version 10.0.26100 Copyright (C) 2013 Microsoft Corporation. Alle Rechte vorbehalten. Datenträgervolumes, die mit BitLocker-Laufwerkverschlüsselung geschützt werden können: Volume "C:" [System] [Betriebssystemvolume] Größe: 465,00 GB BitLocker-Version: 2.0 Konvertierungsstatus: Nur verwendeter Speicherplatz ist verschlüsselt Verschlüsselt (Prozent): 100,0 % Verschlüsselungsmethode: XTS-AES 128 Schutzstatus: Der Schutz ist aktiviert. Sperrungsstatus: Entsperrt ID-Feld: Unbekannt Schlüsselschutzvorrichtungen: Kennwort
C:\Windows\System32>manage-bde -status
BitLocker-Laufwerkverschlüsselung: Konfigurationstool, Version 10.0.26100
Copyright (C) 2013 Microsoft Corporation. Alle Rechte vorbehalten.

Datenträgervolumes, die mit BitLocker-Laufwerkverschlüsselung
geschützt werden können:
Volume "C:" [System]
[Betriebssystemvolume]

    Größe:                        465,00 GB
    BitLocker-Version:            2.0
    Konvertierungsstatus:         Nur verwendeter Speicherplatz ist verschlüsselt
    Verschlüsselt (Prozent):      100,0 %
    Verschlüsselungsmethode:      XTS-AES 128
    Schutzstatus:                 Der Schutz ist aktiviert.
    Sperrungsstatus:              Entsperrt
    ID-Feld:                      Unbekannt
    Schlüsselschutzvorrichtungen:
        Kennwort

Starte ich meinen Computer und wähle im Grub Windows aus, werde ich danach nach meinem BitLocker-Kennwort gefragt, und das System fährt sauber hoch.

Fragen? Dann fragen 🙂

WordPress wp-cron.php: Ist die angebliche Sicherheitslücke echt?

Picture of an hacker checken for wordpress vulnerability

In letzter Zeit begegnen mir immer wieder sogenannte „Vulnerability Report Scams“. Klar, mit Angst und Unwissenheit kann man Geld verdienen – also wird es auch jemand tun. Besonders fällt mir das im Zusammenhang mit der wp-cron.php auf.

Ich habe häufig Reports gesehen, die in etwa so aussehen:

Plain text
Copy to clipboard
Open code in new window
EnlighterJS 3 Syntax Highlighter
Critical Vulnerability Report- {Critical BUG #P1} - https://www.example.com/ - vulnerable to attack via wp-cron.php
Hello Security team,
I am a Security Engineer, Cyber Security Researcher, Bug Bounty Hunter & Ethical Hacker. While testing your domain https://www.example.com/ I have found some important vulnerabilities in your site.
Vulnerability Name: https://www.example.com/ - vulnerable to DoS attack via wp-cron.php
Vulnerable Domain: https://www.example.com/wp-cron.php
Description:
The WordPress application is vulnerable to a Denial of Service (DoS) attack via the wp-cron.php script. This script is used by WordPress to perform scheduled tasks, such as publishing scheduled posts, checking for updates, and running plugins.
An attacker can exploit this vulnerability by sending a large number of requests to the wp-cron.php script, causing it to consume excessive resources and overload the server. This can lead to the application becoming unresponsive or crashing, potentially causing data loss and downtime.
I found this vulnerability at https://www.example.com/wp-cron.php endpoint.
Steps to Reproduce: reference- https://hackerone.com/reports/1888723
navigate to: https://www.example.com/wp-cron.php
intercept the request through the burp suite
right click on the request and send it to the repeater
Now send a request, and you will see the response as 200 OK
---
this can be also done by the curl command given below
curl -I "https://www.example.com/wp-cron.php"
POC: Attached
Impact:
If successful, this misconfigured wp-cron.php file can cause lots of damage to the site, such as:
Potential Denial of Service (DoS) attacks, resulting in unavailability of the application.
Server overload and increased resource usage, leading to slow response times or application crashes.
Potential data loss and downtime of the site.
Hackers can exploit the misconfiguration to execute malicious tasks, leading to security breaches.
Exploitation:
Exploitation can be done through a GitHub tool called doser.go https://github.com/Quitten/doser.go
I did not do that as this can impact your website.
Get the doser.py script at https://github.com/Quitten/doser.py
Use this command to run the script: python3 doser.py -t 999 -g 'https://www.example.com/wp-cron.php'
Go after https://www.example.com/ 1000 requests of the doser.py script.
The site returns code 502.
Suggested Mitigation/Remediation Actions:
To mitigate this vulnerability, it is recommended to disable the default WordPress wp-cron.php script and set up a server-side cron job instead. Here are the steps to disable the default wp-cron.php script and set up a server-side cron job:
Access your website's root directory via FTP or cPanel File Manager.
Locate the wp-config.php file and open it for editing.
Add the following line of code to the file, just before the line that says "That's all, stop editing! Happy publishing.":
1define('DISABLE_WP_CRON', true);
Save the changes to the wp-config.php file.
Set up a server-side cron job to run the wp-cron.php script at the desired interval. This can be done using the server's control panel or by editing the server's crontab file.
References:
For more information about this vulnerability, please refer to the following resources:
https://hackerone.com/reports/1888723
https://medium.com/@mayank_prajapati/what-is-wp-cron-php-0dd4c31b0fee
<blockquote class="wp-embedded-content" data-secret="bhpGpkFciz"><a href="https://developer.wordpress.org/plugins/cron/">Cron</a></blockquote><iframe loading="lazy" class="wp-embedded-content" sandbox="allow-scripts" security="restricted" style="position: absolute; visibility: hidden;" title="“Cron” — WordPress Developer Resources" src="https://developer.wordpress.org/plugins/cron/embed/#?secret=IPOv13Kdcz#?secret=bhpGpkFciz" data-secret="bhpGpkFciz" width="600" height="338" frameborder="0" marginwidth="0" marginheight="0" scrolling="no"></iframe>
Fix Them
-----
I have protected your company and saved it from a big loss so give me some appreciation Bounty Reward.
I am sharing my PayPal ID with you.
Paypal ID: woop woop
Current Market Value Minimum Bounty Reward for Critical BUG P1 Type.
The bug I reported is part of type P1
Vulnerability severity Bug bounty reward amount (in USD)
P1 (Critical) $2500
P2 (High) $1500
P3 (Medium) $1000
P4 (Low) $500
Please feel free to let me know if you have any other questions or need further information.
I am happy to secure it.
I hope this will be fixed soon. Feel free to let me know if you have any other questions.
Thanks & Regards
Critical Vulnerability Report- {Critical BUG #P1} - https://www.example.com/ - vulnerable to attack via wp-cron.php Hello Security team, I am a Security Engineer, Cyber Security Researcher, Bug Bounty Hunter & Ethical Hacker. While testing your domain https://www.example.com/ I have found some important vulnerabilities in your site. Vulnerability Name: https://www.example.com/ - vulnerable to DoS attack via wp-cron.php Vulnerable Domain: https://www.example.com/wp-cron.php Description: The WordPress application is vulnerable to a Denial of Service (DoS) attack via the wp-cron.php script. This script is used by WordPress to perform scheduled tasks, such as publishing scheduled posts, checking for updates, and running plugins. An attacker can exploit this vulnerability by sending a large number of requests to the wp-cron.php script, causing it to consume excessive resources and overload the server. This can lead to the application becoming unresponsive or crashing, potentially causing data loss and downtime. I found this vulnerability at https://www.example.com/wp-cron.php endpoint. Steps to Reproduce: reference- https://hackerone.com/reports/1888723 navigate to: https://www.example.com/wp-cron.php intercept the request through the burp suite right click on the request and send it to the repeater Now send a request, and you will see the response as 200 OK --- this can be also done by the curl command given below curl -I "https://www.example.com/wp-cron.php" POC: Attached Impact: If successful, this misconfigured wp-cron.php file can cause lots of damage to the site, such as: Potential Denial of Service (DoS) attacks, resulting in unavailability of the application. Server overload and increased resource usage, leading to slow response times or application crashes. Potential data loss and downtime of the site. Hackers can exploit the misconfiguration to execute malicious tasks, leading to security breaches. Exploitation: Exploitation can be done through a GitHub tool called doser.go https://github.com/Quitten/doser.go I did not do that as this can impact your website. Get the doser.py script at https://github.com/Quitten/doser.py Use this command to run the script: python3 doser.py -t 999 -g 'https://www.example.com/wp-cron.php' Go after https://www.example.com/ 1000 requests of the doser.py script. The site returns code 502. Suggested Mitigation/Remediation Actions: To mitigate this vulnerability, it is recommended to disable the default WordPress wp-cron.php script and set up a server-side cron job instead. Here are the steps to disable the default wp-cron.php script and set up a server-side cron job: Access your website's root directory via FTP or cPanel File Manager. Locate the wp-config.php file and open it for editing. Add the following line of code to the file, just before the line that says "That's all, stop editing! Happy publishing.": 1define('DISABLE_WP_CRON', true); Save the changes to the wp-config.php file. Set up a server-side cron job to run the wp-cron.php script at the desired interval. This can be done using the server's control panel or by editing the server's crontab file. References: For more information about this vulnerability, please refer to the following resources: https://hackerone.com/reports/1888723 https://medium.com/@mayank_prajapati/what-is-wp-cron-php-0dd4c31b0fee <blockquote class="wp-embedded-content" data-secret="bhpGpkFciz"><a href="https://developer.wordpress.org/plugins/cron/">Cron</a></blockquote><iframe loading="lazy" class="wp-embedded-content" sandbox="allow-scripts" security="restricted" style="position: absolute; visibility: hidden;" title="“Cron” — WordPress Developer Resources" src="https://developer.wordpress.org/plugins/cron/embed/#?secret=IPOv13Kdcz#?secret=bhpGpkFciz" data-secret="bhpGpkFciz" width="600" height="338" frameborder="0" marginwidth="0" marginheight="0" scrolling="no"></iframe> Fix Them ----- I have protected your company and saved it from a big loss so give me some appreciation Bounty Reward. I am sharing my PayPal ID with you. Paypal ID: woop woop Current Market Value Minimum Bounty Reward for Critical BUG P1 Type. The bug I reported is part of type P1 Vulnerability severity Bug bounty reward amount (in USD) P1 (Critical) $2500 P2 (High) $1500 P3 (Medium) $1000 P4 (Low) $500 Please feel free to let me know if you have any other questions or need further information. I am happy to secure it. I hope this will be fixed soon. Feel free to let me know if you have any other questions. Thanks & Regards
Critical Vulnerability Report- {Critical BUG #P1} - https://www.example.com/ - vulnerable to attack via wp-cron.php

Hello  Security team,

I am a Security Engineer, Cyber Security Researcher, Bug Bounty Hunter  & Ethical Hacker. While testing your domain https://www.example.com/ I have found some important vulnerabilities in your site. 

Vulnerability Name:   https://www.example.com/  -  vulnerable to DoS attack via wp-cron.php

Vulnerable Domain:  https://www.example.com/wp-cron.php

Description: 

The WordPress application is vulnerable to a Denial of Service (DoS) attack via the wp-cron.php script. This script is used by WordPress to perform scheduled tasks, such as publishing scheduled posts, checking for updates, and running plugins.
An attacker can exploit this vulnerability by sending a large number of requests to the wp-cron.php script, causing it to consume excessive resources and overload the server. This can lead to the application becoming unresponsive or crashing, potentially causing data loss and downtime.

I found this vulnerability at https://www.example.com/wp-cron.php endpoint.


Steps to Reproduce: reference- https://hackerone.com/reports/1888723
 
navigate to: https://www.example.com/wp-cron.php
intercept the request through the burp suite
right click on the request and send it to the repeater
Now send a request, and you will see the response as  200 OK

---

this can be also done by the curl command given below

curl -I "https://www.example.com/wp-cron.php"


POC: Attached 

Impact:

If successful, this misconfigured wp-cron.php file can cause lots of damage to the site, such as:

Potential Denial of Service (DoS) attacks, resulting in unavailability of the application.
Server overload and increased resource usage, leading to slow response times or application crashes.
Potential data loss and downtime of the site.
Hackers can exploit the misconfiguration to execute malicious tasks, leading to security breaches.

Exploitation: 
Exploitation can be done through a GitHub tool called doser.go https://github.com/Quitten/doser.go
I did not do that as this can impact your website.
Get the doser.py script at https://github.com/Quitten/doser.py
Use this command to run the script: python3 doser.py -t 999 -g 'https://www.example.com/wp-cron.php'
Go after https://www.example.com/ 1000 requests of the doser.py script.
The site returns code 502.

Suggested Mitigation/Remediation Actions:

To mitigate this vulnerability, it is recommended to disable the default WordPress wp-cron.php script and set up a server-side cron job instead. Here are the steps to disable the default wp-cron.php script and set up a server-side cron job:
Access your website's root directory via FTP or cPanel File Manager.
Locate the wp-config.php file and open it for editing.
Add the following line of code to the file, just before the line that says "That's all, stop editing! Happy publishing.":

1define('DISABLE_WP_CRON', true);

Save the changes to the wp-config.php file.
Set up a server-side cron job to run the wp-cron.php script at the desired interval. This can be done using the server's control panel or by editing the server's crontab file.
References:

For more information about this vulnerability, please refer to the following resources:

https://hackerone.com/reports/1888723

https://medium.com/@mayank_prajapati/what-is-wp-cron-php-0dd4c31b0fee

Cron
Fix Them ----- I have protected your company and saved it from a big loss so give me some appreciation Bounty Reward. I am sharing my PayPal ID with you. Paypal ID: woop woop Current Market Value Minimum Bounty Reward for Critical BUG P1 Type. The bug I reported is part of type P1 Vulnerability severity Bug bounty reward amount (in USD) P1 (Critical) $2500 P2 (High) $1500 P3 (Medium) $1000 P4 (Low) $500 Please feel free to let me know if you have any other questions or need further information. I am happy to secure it. I hope this will be fixed soon. Feel free to let me know if you have any other questions. Thanks & Regards

Ist das nun ein echtes Problem oder nicht?

Nun… Ja und Nein. In der Nachricht wird korrekt beschrieben, was die wp-cron.php tut und warum sie wichtig ist. Auch die Tatsache, dass sie extern unendlich oft aufgerufen werden kann und dadurch potenziell eine Überlastung auslösen könnte, ist nicht falsch. Selbst der Tipp, auf eine lokale Crontab-Version umzusteigen, ist nicht verkehrt. Allerdings muss man das Ganze in den richtigen Kontext setzen: wp-cron.php ist standardmäßig in WordPress aktiviert und wird für geplante Aufgaben genutzt. Die geplanten Aufgaben werden in der Datenbank abgelegt, gibt es etwas zutun und die wp-cron.php wird aufgerufen, dann wird auch gearbeitet, gibt es nichts zutun, dann gibt es auch keine Arbeit. Die Empfehlung, sie zu deaktivieren und durch einen serverseitigen Cron-Job zu ersetzen, ist eher eine Performance-Optimierung als eine echte Sicherheitsmaßnahme.

Es handelt sich hierbei nicht um einen Zero-Day-Exploit und es gibt keine direkte Gefahr eines Datenabflusses. Falls es wirklich zu Performance-Problemen kommt, gibt es einfache Gegenmaßnahmen. Sollte tatsächlich jemand versuchen, die wp-cron.php gezielt anzugreifen, hilft ein simples Rate Limiting – entweder über die Firewall oder direkt mit mod_security (Apache) bzw. limit_req (nginx).

Ein Beispiel für nginx:

Plain text
Copy to clipboard
Open code in new window
EnlighterJS 3 Syntax Highlighter
limit_req_zone $binary_remote_addr zone=cronlimit:10m rate=1r/s;
server {
location = /wp-cron.php {
limit_req zone=cronlimit burst=3 nodelay;
limit_req_status 429;
}
}
limit_req_zone $binary_remote_addr zone=cronlimit:10m rate=1r/s; server { location = /wp-cron.php { limit_req zone=cronlimit burst=3 nodelay; limit_req_status 429; } }
limit_req_zone $binary_remote_addr zone=cronlimit:10m rate=1r/s;

server {
    location = /wp-cron.php {
        limit_req zone=cronlimit burst=3 nodelay;
        limit_req_status 429;
    }
}

Das begrenzt die Anfragen auf 1 Anfrage pro Sekunde, mit maximal 3 Anfragen in kurzer Zeit.

Sollte man wp-cron.php einfach deaktivieren?

Nicht unbedingt. Klar, im Fall eines Angriffs kann das als erste Maßnahme helfen. Besser ist es aber, wp-cron.php lokal auszuführen und den Zugriff darauf über den Webserver auf bestimmte IP-Adressen zu beschränken – zum Beispiel die lokale des Webservers. Anschließend kann man einen Cronjob anlegen, der alle 15 Minuten ausgeführt wird:

Plain text
Copy to clipboard
Open code in new window
EnlighterJS 3 Syntax Highlighter
*/15 * * * * wget -q -O - https://www.example.com/wp-cron.php?doing_wp_cron >/dev/null 2>&1

Zugriff per nginx einschränken:

Plain text
Copy to clipboard
Open code in new window
EnlighterJS 3 Syntax Highlighter
location ~* ^/wp-cron.php$ {
allow 1.2.3.4; # Ersetze mit deiner IP
deny all;
}
location ~* ^/wp-cron.php$ { allow 1.2.3.4; # Ersetze mit deiner IP deny all; }
location ~* ^/wp-cron.php$ {
    allow 1.2.3.4;  # Ersetze mit deiner IP
    deny all;
}

Fazit:

Das ist ganz sicher kein P1-Bug. Und wenn der Report direkt eine Preistabelle mitliefert, ist das schon ein ziemlich eindeutiges Zeichen für einen Scam.

Zusammengefasst:

  • Ja, wp-cron.php könnte unter bestimmten Umständen zu Problemen führen.
  • Nein, es ist kein echter Sicherheits-Bug.
  • Wer weiß, was er tut, hat bereits die richtigen Maßnahmen getroffen.

Also: Keine Panik. Stattdessen lieber kurz die eigene Konfiguration prüfen und gut ist.

Wer auf das nginx Rate Limit setzt und dieses einfach testen möchte, kann das folgende Bash-Script nutzen: rate_limit_test.sh


08-03-2025 kleines Update. Das script ist zu github gewechselt.

FreeBSD SSH-Server mit MFA/2FA: Sicherheit leicht gemacht

Dass man eigentlich keinen reinen Kennwort-Login für seine Anmeldung an einem SSH-Server haben möchte, ist sicherlich bei fast allen angekommen. Kennwörter lassen sich einfacher mittels eines Brute-Force-Angriffes herausfinden. Ebenso gehen diese auch mal verloren. SSH-Keys werden die meisten ebenfalls bereits aufseiten des Clients mit einem zweiten Faktor geschützt haben. Dies kann ein MFA-Token sein oder einfach eine Passphrase.

Hin und wieder lässt es sich aber nicht vermeiden, dass man seinen Login nur mit einer einfachen Kombination aus Benutzername und Kennwort sichert. Um dieses dennoch etwas aufzuwerten, lässt sich dieses ebenfalls mit MFA ausstatten. In diesem kurzen Beispiel geht es dabei um einen SSH-Server auf einem FreeBSD-System, welches nach der Authentifizierung mittels Benutzername/Kennwort noch nach einem Auth-Code vom Google Authenticator fragt.

Clientseitig ist eigentlich nichts weiter zu beachten. Auf Serverseite muss das Paket pam_google_authenticator installiert werden:

Plain text
Copy to clipboard
Open code in new window
EnlighterJS 3 Syntax Highlighter
pkg install pam_google_authenticator

Ist die Installation abgeschlossen, müssen wir nun unsere PAM-Konfiguration für den SSHD-Password-Login erweitern. Oh, ja… Auf demselben Weg lässt sich dieses ebenfalls für den normalen Login an der Konsole, für su, ftp usw. einbinden. Selbstverständlich ebenfalls für den Login per SSH-Keys. Wir bleiben aber hier nun beim Login mit User/Pass. Meine /etc/pam.d/sshd sieht damit wie folgt aus:

Plain text
Copy to clipboard
Open code in new window
EnlighterJS 3 Syntax Highlighter
#
#
# PAM configuration for the "sshd" service
#
# auth
#auth sufficient pam_krb5.so no_warn try_first_pass
#auth sufficient pam_ssh.so no_warn try_first_pass
auth required pam_unix.so no_warn try_first_pass
auth required /usr/local/lib/pam_google_authenticator.so
# account
account required pam_nologin.so
#account required pam_krb5.so
account required pam_login_access.so
account required pam_unix.so
# session
#session optional pam_ssh.so want_agent
session required pam_permit.so
# password
#password sufficient pam_krb5.so no_warn try_first_pass
password required pam_unix.so no_warn try_first_pass
# # # PAM configuration for the "sshd" service # # auth #auth sufficient pam_krb5.so no_warn try_first_pass #auth sufficient pam_ssh.so no_warn try_first_pass auth required pam_unix.so no_warn try_first_pass auth required /usr/local/lib/pam_google_authenticator.so # account account required pam_nologin.so #account required pam_krb5.so account required pam_login_access.so account required pam_unix.so # session #session optional pam_ssh.so want_agent session required pam_permit.so # password #password sufficient pam_krb5.so no_warn try_first_pass password required pam_unix.so no_warn try_first_pass
#
#
# PAM configuration for the "sshd" service
#

# auth
#auth		sufficient	pam_krb5.so		no_warn try_first_pass
#auth		sufficient	pam_ssh.so		no_warn try_first_pass
auth		required	pam_unix.so		no_warn try_first_pass
auth            required        /usr/local/lib/pam_google_authenticator.so

# account
account		required	pam_nologin.so
#account	required	pam_krb5.so
account		required	pam_login_access.so
account		required	pam_unix.so

# session
#session	optional	pam_ssh.so		want_agent
session		required	pam_permit.so

# password
#password	sufficient	pam_krb5.so		no_warn try_first_pass
password	required	pam_unix.so		no_warn try_first_pass

Ebenfalls muss die folgende Option in der /etc/ssh/sshd_config aktiviert sein:

Plain text
Copy to clipboard
Open code in new window
EnlighterJS 3 Syntax Highlighter
ChallengeResponseAuthentication yes

Das war es auch schon fast. Wenn man nun auf seinem Smartphone noch schnell den Google Authenticator installiert, können wir schon damit beginnen, den zweiten Faktor zu erstellen. Dafür einfach mit dem gewünschten Nutzer in dessen Home-Verzeichnis: „cd ~“ den google-authenticator aufrufen und den Anweisungen folgen:

Dieses nur noch mit der Authenticator-App am Smartphone scannen, den Code einmal eingeben und schon wird man bei jedem Kennwort-Login nach seinem aktuellen Code gefragt.

Oh, sehr ähnlich ist die Einrichtung unter Linux 🙂

Linux Mint und Ubuntu: DNSSEC aktivieren und sicher surfen

Heute habe ich versucht, mich von meiner neuen Linux Mint Installation aus mit einem meiner SSH-Server zu verbinden. Mein SSH-Client hat mich direkt mit der Frage begrüßt, ob ich dem neuen Hostkey vertrauen möchte oder nicht.

Plain text
Copy to clipboard
Open code in new window
EnlighterJS 3 Syntax Highlighter
ssh username@hostname.kernel-error.org
The authenticity of host 'hostname.kernel-error.org (2a01:5a8:362:4416::32)' can't be established.
ED25519 key fingerprint is SHA256:kTRGVCMRLiHfvJunW2CbW5H3NZmn3Wkx2KnHJXl3iJu.
This key is not known by any other names
Are you sure you want to continue connecting (yes/no/[fingerprint])?
ssh username@hostname.kernel-error.org The authenticity of host 'hostname.kernel-error.org (2a01:5a8:362:4416::32)' can't be established. ED25519 key fingerprint is SHA256:kTRGVCMRLiHfvJunW2CbW5H3NZmn3Wkx2KnHJXl3iJu. This key is not known by any other names Are you sure you want to continue connecting (yes/no/[fingerprint])?
ssh username@hostname.kernel-error.org
The authenticity of host 'hostname.kernel-error.org (2a01:5a8:362:4416::32)' can't be established.
ED25519 key fingerprint is SHA256:kTRGVCMRLiHfvJunW2CbW5H3NZmn3Wkx2KnHJXl3iJu.
This key is not known by any other names
Are you sure you want to continue connecting (yes/no/[fingerprint])?

Für viele mag diese Meldung bekannt und vollkommen normal erscheinen. In der Regel antwortet man initial mit „yes“ und sieht sie nie wieder. Aber diese Meldung hat ihren Grund. Beim initialen Aufbau einer Verbindung zu einem SSH-Server wird einem der Fingerprint des HostKeys angezeigt. So hat man die Möglichkeit, den Fingerprint mit dem erwarteten Fingerprint abzugleichen, um sicherzustellen, dass man sich wirklich mit dem gewünschten SSH-Server verbindet und nicht etwa ein Angreifer Zugangsdaten abfischt. Wenn man eh immer nur „JA“ sagt, könnte man diesen Check auch direkt in seiner ~/.ssh/config mit folgendem Eintrag deaktivieren:

Plain text
Copy to clipboard
Open code in new window
EnlighterJS 3 Syntax Highlighter
Host *
StrictHostKeyChecking no
Host * StrictHostKeyChecking no
Host *
    StrictHostKeyChecking no

Warum erzähle ich das alles? Nun, weil es für mich eigentlich nicht normal ist, diese Meldung zu sehen. Denn es gibt die Möglichkeit, die Fingerprints der erwarteten HostKeys in seiner DNS-Zone zu hinterlegen und seinen SSH-Client mit der folgenden Konfiguration in seiner ~/.ssh/config anzuweisen, dies einfach selbst zu überprüfen, sofern der SSH-Client eine vertrauenswürdige Antwort vom DNS-Server erhält.

Plain text
Copy to clipboard
Open code in new window
EnlighterJS 3 Syntax Highlighter
Host *
VerifyHostKeyDNS yes
Host * VerifyHostKeyDNS yes
Host *
   VerifyHostKeyDNS yes

Vertrauenswürdige Antwort vom DNS-Server… Hier sind wir schon bei DNSSEC angekommen. Meine DNS-Server, einschließlich des lokalen Resolvers auf meinem Router, unterstützen alle DNSSEC. Meine SSH-Client-Konfiguration ist korrekt und dennoch erscheint die Meldung…. Also habe ich den Verbindungsaufbau mit etwas mehr Debugging-Output gestartet, was bei ssh einfach die zusätzliche Option -vvv bedeutet:

Plain text
Copy to clipboard
Open code in new window
EnlighterJS 3 Syntax Highlighter
ssh usermane@hostname.kernel-error.org -vvv
[...]
debug1: SSH2_MSG_KEX_ECDH_REPLY received
debug1: Server host key: ssh-ed25519 SHA256:kTRGVCMRLiHfvJunW2CbW5H3NZmn3Wkx2KnHJXl3iJu
debug3: verify_host_key_dns
debug1: found 2 insecure fingerprints in DNS
debug3: verify_host_key_dns: checking SSHFP type 4 fptype 1
debug1: verify_host_key_dns: matched SSHFP type 4 fptype 1
debug3: verify_host_key_dns: checking SSHFP type 4 fptype 2
debug1: verify_host_key_dns: matched SSHFP type 4 fptype 2
debug1: matching host key fingerprint found in DNS
[...]
ssh usermane@hostname.kernel-error.org -vvv [...] debug1: SSH2_MSG_KEX_ECDH_REPLY received debug1: Server host key: ssh-ed25519 SHA256:kTRGVCMRLiHfvJunW2CbW5H3NZmn3Wkx2KnHJXl3iJu debug3: verify_host_key_dns debug1: found 2 insecure fingerprints in DNS debug3: verify_host_key_dns: checking SSHFP type 4 fptype 1 debug1: verify_host_key_dns: matched SSHFP type 4 fptype 1 debug3: verify_host_key_dns: checking SSHFP type 4 fptype 2 debug1: verify_host_key_dns: matched SSHFP type 4 fptype 2 debug1: matching host key fingerprint found in DNS [...]
ssh usermane@hostname.kernel-error.org -vvv
[...]
debug1: SSH2_MSG_KEX_ECDH_REPLY received
debug1: Server host key: ssh-ed25519 SHA256:kTRGVCMRLiHfvJunW2CbW5H3NZmn3Wkx2KnHJXl3iJu
debug3: verify_host_key_dns
debug1: found 2 insecure fingerprints in DNS
debug3: verify_host_key_dns: checking SSHFP type 4 fptype 1
debug1: verify_host_key_dns: matched SSHFP type 4 fptype 1
debug3: verify_host_key_dns: checking SSHFP type 4 fptype 2
debug1: verify_host_key_dns: matched SSHFP type 4 fptype 2
debug1: matching host key fingerprint found in DNS
[...]

Zu meiner Überraschung sehe ich:

Plain text
Copy to clipboard
Open code in new window
EnlighterJS 3 Syntax Highlighter
debug1: found 2 insecure fingerprints in DNS

Hm… „insecure“… Er hat also die passenden Einträge in der DNS-Zone gefunden, kann diesen aber nicht vertrauen, weil… ja, warum? Die Antwort des DNS-Servers ist nicht vertrauenswürdig? OK, das lässt sich einfach mit dig und der Option +dnssec testen. Wir suchen einfach im Header nach „ad„:

Plain text
Copy to clipboard
Open code in new window
EnlighterJS 3 Syntax Highlighter
dig +dnssec hostname.kernel-error.org @8.8.8.8
; <<>> DiG 9.18.18-0ubuntu0.22.04.2-Ubuntu <<>> +dnssec hostname.kernel-error.org
;; global options: +cmd
;; Got answer:
;; ->>HEADER<<- opcode: QUERY, status: NOERROR, id: 48645
;; flags: qr rd ra ad; QUERY: 1, ANSWER: 2, AUTHORITY: 0, ADDITIONAL: 1
[...]
dig +dnssec hostname.kernel-error.org @8.8.8.8 ; <<>> DiG 9.18.18-0ubuntu0.22.04.2-Ubuntu <<>> +dnssec hostname.kernel-error.org ;; global options: +cmd ;; Got answer: ;; ->>HEADER<<- opcode: QUERY, status: NOERROR, id: 48645 ;; flags: qr rd ra ad; QUERY: 1, ANSWER: 2, AUTHORITY: 0, ADDITIONAL: 1 [...]
dig +dnssec hostname.kernel-error.org @8.8.8.8

; <<>> DiG 9.18.18-0ubuntu0.22.04.2-Ubuntu <<>> +dnssec hostname.kernel-error.org
;; global options: +cmd
;; Got answer:
;; ->>HEADER<<- opcode: QUERY, status: NOERROR, id: 48645
;; flags: qr rd ra ad; QUERY: 1, ANSWER: 2, AUTHORITY: 0, ADDITIONAL: 1
[...]

@8.8.8.8 gibt an, dass direkt der öffentliche DNS-Server von Google gefragt wird. Dieser wird natürlich meine Server fragen usw., einfach um sicherzugehen, dass meine eigentlichen DNS-Server, die für die Zone zuständig sind, sauber konfiguriert sind. Ich sehe ein „ad„, also ist dort schon mal alles gut. Im Anschluss habe ich den Test noch mit meinem lokalen DNS-Resolver auf dem Router durchgeführt. Also einfach @192.168.0.1 oder was auch immer euer lokaler Router ist. Gleiches Ergebnis…. Aber warum will dann mein Linux Mint nicht? Sollte Linux Mint etwa kein DNSSEC können?

Plain text
Copy to clipboard
Open code in new window
EnlighterJS 3 Syntax Highlighter
dig +dnssec hostname.kernel-error.org
; <<>> DiG 9.18.18-0ubuntu0.22.04.2-Ubuntu <<>> +dnssec hostname.kernel-error.org
;; global options: +cmd
;; Got answer:
;; ->>HEADER<<- opcode: QUERY, status: NOERROR, id: 1789
;; flags: qr rd ra; QUERY: 1, ANSWER: 2, AUTHORITY: 0, ADDITIONAL: 1
[...]
dig +dnssec hostname.kernel-error.org ; <<>> DiG 9.18.18-0ubuntu0.22.04.2-Ubuntu <<>> +dnssec hostname.kernel-error.org ;; global options: +cmd ;; Got answer: ;; ->>HEADER<<- opcode: QUERY, status: NOERROR, id: 1789 ;; flags: qr rd ra; QUERY: 1, ANSWER: 2, AUTHORITY: 0, ADDITIONAL: 1 [...]
dig +dnssec hostname.kernel-error.org

; <<>> DiG 9.18.18-0ubuntu0.22.04.2-Ubuntu <<>> +dnssec hostname.kernel-error.org
;; global options: +cmd
;; Got answer:
;; ->>HEADER<<- opcode: QUERY, status: NOERROR, id: 1789
;; flags: qr rd ra; QUERY: 1, ANSWER: 2, AUTHORITY: 0, ADDITIONAL: 1
[...]

Öhhh ähhh… Ja, öhm, geht nicht… Aber warum? Was steht denn in meiner /etc/resolv.conf? 127.0.0.53? Ohhhhhhhh, stimmt! systemd-resolv! OK, ok… Ich könnte also in meiner /etc/systemd/resolved.conf nun einfach DNSSEC=yes setzen und mit einem systemctl restart systemd-resolved sollte dann… Nope, leider nicht. Nun geht überhaupt keine DNS-Auflösung mehr. Es scheint am eingesetzten Stub-Resolver zu liegen, den man ebenfalls noch ändern kann usw… Nennt mich etwas oldschool, aber für meine Zwecke reicht der klassische Weg über die vom NetworkManager gepflegte resolv.conf. Um also systemd-resolved zu deaktivieren und auf den NetworkManager zu wechseln, sind die folgenden Schritte nötig:

Plain text
Copy to clipboard
Open code in new window
EnlighterJS 3 Syntax Highlighter
sudo systemctl disable systemd-resolved
sudo systemctl stop systemd-resolved
sudo rm /etc/resolv.conf
sudo systemctl disable systemd-resolved sudo systemctl stop systemd-resolved sudo rm /etc/resolv.conf
sudo systemctl disable systemd-resolved
sudo systemctl stop systemd-resolved
sudo rm /etc/resolv.conf

Dann in die Konfigurationsdatei vom NetworkManager /etc/NetworkManager/NetworkManager.conf in der [main]-Sektion die folgende Option setzen:

Plain text
Copy to clipboard
Open code in new window
EnlighterJS 3 Syntax Highlighter
dns=default
dns=default
dns=default

Nun nur noch den NetworkManager neu starten und schon sollte die /etc/resolv.conf mit den DNS-Informationen gefüttert werden:

Plain text
Copy to clipboard
Open code in new window
EnlighterJS 3 Syntax Highlighter
sudo systemctl restart NetworkManager
cat /etc/resolv.conf
# Generated by NetworkManager
search kernel-error.local
nameserver 10.10.88.1
nameserver fd00:424e:6eff:f525:454e:6eff:f525:4241
sudo systemctl restart NetworkManager cat /etc/resolv.conf # Generated by NetworkManager search kernel-error.local nameserver 10.10.88.1 nameserver fd00:424e:6eff:f525:454e:6eff:f525:4241
sudo systemctl restart NetworkManager
cat /etc/resolv.conf
# Generated by NetworkManager
search kernel-error.local
nameserver 10.10.88.1
nameserver fd00:424e:6eff:f525:454e:6eff:f525:4241

Perfekt! Also los, noch ein Versuch mit dem SSH-Client und… nichts… DNS-Auflösung funktioniert, aber es ist noch immer „insecure„. Stimmt! Es fehlt etwas in meiner resolv.conf. Wir brauchen bestimmt noch die folgende Option:

Plain text
Copy to clipboard
Open code in new window
EnlighterJS 3 Syntax Highlighter
options edns0
options edns0
options edns0

Jetzt aber! HA, dig ist schon mal glücklich, ich sehe ein „ad“. Ähm, aber der SSH-Client noch immer nicht?! Was zum… OK, OK… Irgendwas um SSH muss ich vergessen haben. Aber was? Wie macht SSH das überhaupt? Vielleicht gibt mir das eine Idee. Also, mal kurz in den Code geschaut, C bekomme ich gerade noch hin:

Plain text
Copy to clipboard
Open code in new window
EnlighterJS 3 Syntax Highlighter
/* Check for authenticated data */
if (ldns_pkt_ad(pkt)) {
rrset->rri_flags |= RRSET_VALIDATED;
} else { /* AD is not set, try autonomous validation */
ldns_rr_list * trusted_keys = ldns_rr_list_new();
debug2("ldns: trying to validate RRset");
/* Get eventual sigs */
rrsigs = ldns_pkt_rr_list_by_type(pkt, LDNS_RR_TYPE_RRSIG,
LDNS_SECTION_ANSWER);
rrset->rri_nsigs = ldns_rr_list_rr_count(rrsigs);
debug2("ldns: got %u signature(s) (RRTYPE %u) from DNS",
rrset->rri_nsigs, LDNS_RR_TYPE_RRSIG);
if ((err = ldns_verify_trusted(ldns_res, rrdata, rrsigs,
trusted_keys)) == LDNS_STATUS_OK) {
rrset->rri_flags |= RRSET_VALIDATED;
debug2("ldns: RRset is signed with a valid key");
} else {
debug2("ldns: RRset validation failed: %s",
ldns_get_errorstr_by_id(err));
}
ldns_rr_list_deep_free(trusted_keys);
}
/* Check for authenticated data */ if (ldns_pkt_ad(pkt)) { rrset->rri_flags |= RRSET_VALIDATED; } else { /* AD is not set, try autonomous validation */ ldns_rr_list * trusted_keys = ldns_rr_list_new(); debug2("ldns: trying to validate RRset"); /* Get eventual sigs */ rrsigs = ldns_pkt_rr_list_by_type(pkt, LDNS_RR_TYPE_RRSIG, LDNS_SECTION_ANSWER); rrset->rri_nsigs = ldns_rr_list_rr_count(rrsigs); debug2("ldns: got %u signature(s) (RRTYPE %u) from DNS", rrset->rri_nsigs, LDNS_RR_TYPE_RRSIG); if ((err = ldns_verify_trusted(ldns_res, rrdata, rrsigs, trusted_keys)) == LDNS_STATUS_OK) { rrset->rri_flags |= RRSET_VALIDATED; debug2("ldns: RRset is signed with a valid key"); } else { debug2("ldns: RRset validation failed: %s", ldns_get_errorstr_by_id(err)); } ldns_rr_list_deep_free(trusted_keys); }
        /* Check for authenticated data */
        if (ldns_pkt_ad(pkt)) {
                rrset->rri_flags |= RRSET_VALIDATED;
        } else { /* AD is not set, try autonomous validation */
                ldns_rr_list * trusted_keys = ldns_rr_list_new();

                debug2("ldns: trying to validate RRset");
                /* Get eventual sigs */
                rrsigs = ldns_pkt_rr_list_by_type(pkt, LDNS_RR_TYPE_RRSIG,
                    LDNS_SECTION_ANSWER);

                rrset->rri_nsigs = ldns_rr_list_rr_count(rrsigs);
                debug2("ldns: got %u signature(s) (RRTYPE %u) from DNS",
                       rrset->rri_nsigs, LDNS_RR_TYPE_RRSIG);

                if ((err = ldns_verify_trusted(ldns_res, rrdata, rrsigs,
                     trusted_keys)) == LDNS_STATUS_OK) {
                        rrset->rri_flags |= RRSET_VALIDATED;
                        debug2("ldns: RRset is signed with a valid key");
                } else {
                        debug2("ldns: RRset validation failed: %s",
                            ldns_get_errorstr_by_id(err));
                }

                ldns_rr_list_deep_free(trusted_keys);
        }

Aaaaaaaaaaaaaaaaaaaaaaa… ldns… woher bekommt er wohl die Trust Keys? Genau… woher? Da fehlt also NOCH etwas in meiner resolv.conf:

Plain text
Copy to clipboard
Open code in new window
EnlighterJS 3 Syntax Highlighter
options edns0 trust-ad

Und? genau… geht 😀

Plain text
Copy to clipboard
Open code in new window
EnlighterJS 3 Syntax Highlighter
ssh usermane@hostname.kernel-error.org -vvv
[...]
debug1: SSH2_MSG_KEX_ECDH_REPLY received
debug1: Server host key: ssh-ed25519 SHA256:kTRGVCMRLiHfvJunW2CbW5H3NZmn3Wkx2KnHJXl3iJu
debug3: verify_host_key_dns
debug1: found 2 secure fingerprints in DNS
debug3: verify_host_key_dns: checking SSHFP type 4 fptype 1
debug1: verify_host_key_dns: matched SSHFP type 4 fptype 1
debug3: verify_host_key_dns: checking SSHFP type 4 fptype 2
debug1: verify_host_key_dns: matched SSHFP type 4 fptype 2
debug1: matching host key fingerprint found in DNS
[...]
ssh usermane@hostname.kernel-error.org -vvv [...] debug1: SSH2_MSG_KEX_ECDH_REPLY received debug1: Server host key: ssh-ed25519 SHA256:kTRGVCMRLiHfvJunW2CbW5H3NZmn3Wkx2KnHJXl3iJu debug3: verify_host_key_dns debug1: found 2 secure fingerprints in DNS debug3: verify_host_key_dns: checking SSHFP type 4 fptype 1 debug1: verify_host_key_dns: matched SSHFP type 4 fptype 1 debug3: verify_host_key_dns: checking SSHFP type 4 fptype 2 debug1: verify_host_key_dns: matched SSHFP type 4 fptype 2 debug1: matching host key fingerprint found in DNS [...]
ssh usermane@hostname.kernel-error.org -vvv
[...]
debug1: SSH2_MSG_KEX_ECDH_REPLY received
debug1: Server host key: ssh-ed25519 SHA256:kTRGVCMRLiHfvJunW2CbW5H3NZmn3Wkx2KnHJXl3iJu
debug3: verify_host_key_dns
debug1: found 2 secure fingerprints in DNS
debug3: verify_host_key_dns: checking SSHFP type 4 fptype 1
debug1: verify_host_key_dns: matched SSHFP type 4 fptype 1
debug3: verify_host_key_dns: checking SSHFP type 4 fptype 2
debug1: verify_host_key_dns: matched SSHFP type 4 fptype 2
debug1: matching host key fingerprint found in DNS
[...]

Pfff… nun habe ich natürlich die Optionen von Hand in meine resolv.conf eingetragen, der NetworkManager wird diese Option also spätestens beim nächsten Boot rauswerfen. Also muss ich noch meinem NetworkManager beibringen, dass er bitte diese Option ebenfalls in meine resolv.conf schreibt, wenn das jeweilige Netzwerkprofil aktiviert ist. Dazu gibt es aber leider keinen Menüpunkt in der GUI vom NetworkManager, also muss das per CLI gemacht werden. Dieses für IPv4 und IPv6 gleichermaßen, sonst greift es leider nicht!

Plain text
Copy to clipboard
Open code in new window
EnlighterJS 3 Syntax Highlighter
nmcli conn modify DEINE-PROFIL-UUID ipv4.dns-options edns0,trust-ad
nmcli conn modify DEINE-PROFIL-UUID ipv6.dns-options edns0,trust-ad
nmcli conn modify DEINE-PROFIL-UUID ipv4.dns-options edns0,trust-ad nmcli conn modify DEINE-PROFIL-UUID ipv6.dns-options edns0,trust-ad
nmcli conn modify DEINE-PROFIL-UUID ipv4.dns-options edns0,trust-ad
nmcli conn modify DEINE-PROFIL-UUID ipv6.dns-options edns0,trust-ad

Oh, ein nmcli conn show listet die bestehenden und vor allem das aktive Profil inkl. der UUID auf. Davon abgesehen, klappt es nun so und ist rebootfest.

So und nun ihr! Ich bin mit meinem FreeBSD-Wissen an das Thema herangegangen. Wie macht man das als Hardcore-Linux-User und mit systemd-resolved richtig und funktionierend?

Cloudflare Deal: YubiKeys für nur 10-11 USD – Sichere deine Online-Konten

Es gibt aktuell einen EEEECCCHHHTTTT guten Deal um günstig an bis zu 10 YubiKeys 5 NFC und/oder 5C NFC zu kommen.

Man benötigt dafür einen Cloudflare Account, der ist ja schnell geklickt. Dann klickt man ein paar Links und wartet auf eine E-Mail mit seinem Discount Code.

Da die Keys in der Regel etwas um die 50€ Kosten, ist dieses schon eine extreme Ersparnis.

Oh der Link: https://www.reddit.com/r/yubikey/comments/xrcly7/cloudflare_deal_for_1011_keys/

Screenshot der Bestellübersicht für den YubiKey 5 NFC und YubiKey 5C NFC

BIND 9.18: DoH und DoT einrichten für sichere DNS-Abfragen

Über die Techniken DoT (DNS over TLS) habe ich bereits im Zusammenhang mit Bind 9.16 geschrieben. Ebenfalls DoH (DNS over HTTPS) gibt es einen kleinen Beitrag.

Bilder der Bind 9 TLS Konfiguration

Zu diesem Zeitpunkt bracht BIND 9 die Unterstützung für DoH und DoT noch nicht selbst mit. Daher waren zu diesem Zeitpunkt noch Umwege über stunnel oder nginx zusammen mit doh-proxy nötig.

Zum Glück kommt die letzte stable Version 9.18.0 (26. Januar 2022) mit dem nötigen Support.

named now supports securing DNS traffic using Transport Layer Security (TLS). TLS is used by both DNS over TLS (DoT) and DNS over HTTPS (DoH).

Warum möchte man noch gleich DoH oder DoT benutzen? Ganz einfach… Über diese Techniken werden DNS Abfragen verschlüsselt übertragen. Dieses ist ein weiterer Schutz davor manipulierte Antworten zu bekommen und selbstverständlich, damit die eigenen DNS Abfragen erst überhaupt nicht mitgelesen werden. Denn wenn von einem Gerät im Netzwerk die DNS Abfrage zu z.B.: www.tagesschau.de kommt, könnte man davon bereits Dinge ableiten.

Wie die meisten Bind Konfigurationen ist dieses ebenfalls straightforward. Ab Version 9.18 bringt Bind alles Nötige mit. Da wir nun TLS mit dem Bind sprechen möchten, benötigen wir natürlich ein gültiges Zertifikat, wie z.B. beim nginx für seine Webseite.

Ebenfalls sollte man ein paar frische Diffie-Hellmann Parameter generieren:

Plain text
Copy to clipboard
Open code in new window
EnlighterJS 3 Syntax Highlighter
openssl dhparam -out dhparam.pem 4096

Die eigentliche bind Konfiguration kann in der named.conf.options geschehen:

Plain text
Copy to clipboard
Open code in new window
EnlighterJS 3 Syntax Highlighter
options {
[...]
listen-on port 853 tls local-tls { 37.120.183.220; };
listen-on-v6 port 853 tls local-tls { 2a03:4000:38:20e::853; };
listen-on port 443 tls local-tls http default { 37.120.183.220; };
listen-on-v6 port 443 tls local-tls http default { 2a03:4000:38:20e::853; };
[...]
allow-recursion-on { 127.0.0.0/8; ::1/128; 2a03:4000:38:20e::853; 37.120.183.220; };
[...]
};
options { [...] listen-on port 853 tls local-tls { 37.120.183.220; }; listen-on-v6 port 853 tls local-tls { 2a03:4000:38:20e::853; }; listen-on port 443 tls local-tls http default { 37.120.183.220; }; listen-on-v6 port 443 tls local-tls http default { 2a03:4000:38:20e::853; }; [...] allow-recursion-on { 127.0.0.0/8; ::1/128; 2a03:4000:38:20e::853; 37.120.183.220; }; [...] };
options {
        [...]
        listen-on port 853 tls local-tls { 37.120.183.220; };
        listen-on-v6 port 853 tls local-tls { 2a03:4000:38:20e::853; };
        listen-on port 443 tls local-tls http default { 37.120.183.220;  };
        listen-on-v6 port 443 tls local-tls http default { 2a03:4000:38:20e::853; };
        [...]
        allow-recursion-on { 127.0.0.0/8; ::1/128; 2a03:4000:38:20e::853; 37.120.183.220; };
        [...]
};

Da der bind auf weiteren Ports lauschen soll erweitert man diese für IPv4 und IPv6. Der Default Port für DoH ist dabei 443 und der default Port für DoT ist 853, beides TCP.

listen-on sowie listen-on-v6 sind wohl selbsterklärend.
port ist der TCP Port und erklärt sich ebenfalls.
tls sagt dem Bind das wir tls sprechen möchten.
local-tls verweißt auf den gleichnamigen tls Block über welchen man seine TLS Konfiguration vornimmt.
http ist für DoH.
default gibt den eigentlichen endpoint für die DoH Abfragen an, im default ist es /dns-query

Da der Server unsere DNS Abfragen erledigen soll, müssen wir ihm dieses noch per allow-recursion-on auf den jeweiligen Adressen erlauben.

Als nächstes wird die eigentliche TLS Terminierung konfiguriert (das lässt sich ebenfalls auslagern, wenn gewünscht). Dafür wird der folgende Block, außerhalb der Options Blocks, ergänzt:

Plain text
Copy to clipboard
Open code in new window
EnlighterJS 3 Syntax Highlighter
tls local-tls {
cert-file "/usr/local/etc/ssl/wild.kernel-error.de/2022/ecp/chain.crt";
key-file "/usr/local/etc/ssl/wild.kernel-error.de/2022/ecp/http.key";
dhparam-file "/usr/local/etc/ssl/dhparam.pem";
protocols { TLSv1.2; TLSv1.3; };
ciphers "TLS_AES_256_GCM_SHA384:TLS_CHACHA20_POLY1305_SHA256:TLS_AES_128_GCM_SHA256:ECDHE-ECDSA-AES256-GCM-SHA384:ECDHE-ECDSA-AES128-GCM-SHA256";
prefer-server-ciphers yes;
session-tickets no;
};
tls local-tls { cert-file "/usr/local/etc/ssl/wild.kernel-error.de/2022/ecp/chain.crt"; key-file "/usr/local/etc/ssl/wild.kernel-error.de/2022/ecp/http.key"; dhparam-file "/usr/local/etc/ssl/dhparam.pem"; protocols { TLSv1.2; TLSv1.3; }; ciphers "TLS_AES_256_GCM_SHA384:TLS_CHACHA20_POLY1305_SHA256:TLS_AES_128_GCM_SHA256:ECDHE-ECDSA-AES256-GCM-SHA384:ECDHE-ECDSA-AES128-GCM-SHA256"; prefer-server-ciphers yes; session-tickets no; };
tls local-tls {
    cert-file "/usr/local/etc/ssl/wild.kernel-error.de/2022/ecp/chain.crt";
    key-file "/usr/local/etc/ssl/wild.kernel-error.de/2022/ecp/http.key";
    dhparam-file "/usr/local/etc/ssl/dhparam.pem";
    protocols { TLSv1.2; TLSv1.3; };
    ciphers "TLS_AES_256_GCM_SHA384:TLS_CHACHA20_POLY1305_SHA256:TLS_AES_128_GCM_SHA256:ECDHE-ECDSA-AES256-GCM-SHA384:ECDHE-ECDSA-AES128-GCM-SHA256";
    prefer-server-ciphers yes;
    session-tickets no;
};

local-tls ist dabei der name des Blocks. Auf diesen verweisen wir oben.
cert-file ist der Pfad zum Zertifikat. Ich habe dort nicht nur das Zertifikat, sondern die gesamte Chain, also mit Intermediate und Root.
key-file ist der Pfad zum Key des Zertifikates.
dhparam-file ist der Pfad zu den Diffie-Hellman Parametern.
protocols definiert die zu verwendenden TLS Protokolle. In diesem Beispiel TLS1.2 sowie TLS1.3.
ciphers definiert die zu verwendenden cipher. Es soll ja „sicher“ bleiben.
prefer-server-ciphers übermittelt dem Client die Information, in welcher Reihenfolge protokoll/cipher Kombinationen probiert werden sollen um einen Match zu finden. Erst das vermeintlich sicherste und dann immer „schlechter“.
session-tickets regelt ob eine Wiederaufnahme von TLS Sessions erlaubt ist oder nicht. Da ich forward secrecy nutzen möchte, ist es deaktiviert.

Damit ist die Konfiguration schon abgeschlossen (Firewall ggf. nicht vergessen!). Also testen….

Ein einfaches Tool dafür ist dog, oder natürlich dig aus den bind-tools aber Version 9.18. Für bind gibt es dann die Optionen +https oder auch +tls

Plain text
Copy to clipboard
Open code in new window
EnlighterJS 3 Syntax Highlighter
dig +https @dns.kernel-error.de www.kernel-error.de A
dig +tls @dns.kernel-error.de www.kernel-error.de A
dig +https @dns.kernel-error.de www.kernel-error.de A dig +tls @dns.kernel-error.de www.kernel-error.de A
dig +https @dns.kernel-error.de www.kernel-error.de A
dig +tls @dns.kernel-error.de www.kernel-error.de A

Der gleiche Test mit dog, sieht wie folgt aus:

Plain text
Copy to clipboard
Open code in new window
EnlighterJS 3 Syntax Highlighter
dog www.kernel-error.de --tls "@dns.kernel-error.de"
A www.kernel-error.de. 6h00m00s 148.251.40.23
dog www.kernel-error.de --https "@https://dns.kernel-error.de/dns-query"
A www.kernel-error.de. 6h00m00s 148.251.40.23
dog www.kernel-error.de --tls "@dns.kernel-error.de" A www.kernel-error.de. 6h00m00s 148.251.40.23 dog www.kernel-error.de --https "@https://dns.kernel-error.de/dns-query" A www.kernel-error.de. 6h00m00s 148.251.40.23
dog www.kernel-error.de --tls "@dns.kernel-error.de"
A www.kernel-error.de. 6h00m00s   148.251.40.23
dog www.kernel-error.de --https "@https://dns.kernel-error.de/dns-query"
A www.kernel-error.de. 6h00m00s   148.251.40.23

Das war es auch schon! Viele Spaß mit einem „besseren“ DNS und wenn es noch Fragen gibt, einfach fragen 🙂

Windows Server 2012 R2: Sichere Cipher für RRAS konfigurieren

RRAS Routing und RAS Icon.

Wenn ich schon bei den ganzen Microsoft Themen bin, warum nicht gleich noch „sicheres“ RRAS Routing- und RAS  mit einem Windows Server 2012 R2?! Im speziellen Beispiel an einem L2TP IPsec VPN für Clientsysteme.

Hat mein alles im Routing und RAS konfiguriert verbinden sich die Clients im Standard mit etwas wie: SHA-1 3DES und der DH Group 2 was ein modp1024 (1024-bit) ist. Pfffffff SHA-1 ja, ok… 3DES muss nicht unbedingt und modp1024 möchte man auch nicht oder?

Screenshot der Windows-Firewall mit erweiterter Sicherheit und angezeichnetem Klickpfad um die Sichereheitsmethoden zu konfigurieren.

Wie konfiguriert man dieses nun also „weg“? Ich muss zugeben dafür einige Zeit gelesen zu haben. Dann ich hätte erwartet dieses irgendwo in der Nähe vom Routing und RAS konfigurieren zu müssen. Dem ist aber nicht so. Die Konfiguration dieser Parameter findet man über die Windows-Firewall mit erweiterter Sicherheit auf dem Windows Server. Irgendeinen Grund wird es schon haben es dort zu ~verstecken~ und sicher ist dieser absolut einleuchtend, wenn man sich näher damit auskennt. Ich hätte dort von alleine sicher niemals gesucht. Man findet es also über: Windows Firewall ==> recht Maus: Windows-Firewall mit erweiterter Sicherheit ==> Eigenschaften ==> IPsec-Einstellungen ==> IPsec-Standardeinstellungen Button „Anpassen“ ==> Schlüsselaustausch.

Hier kann man nun die Einstellungen konfigurieren… *kopfschüttel* Windows Firewall…. Hat jemand eine Idee warum es ausgerechnet da ist? Wie auch immer…

Screenshot der Windows-Firewall mit erweiterter Sicherheit und angezeichnetem Klickpfad um die Datenschutzeinstellungen zu konfigurieren.

Steht der Windows RRAS hinter einem NAT sollte man ebenfalls noch UDP Encapsulation aktivieren. Dafür habe ich folgendes Registry File für euch:

Nach diesen Änderungen sollte man natürlich ganz Windowslike den Server einmal durchstarten. Baut man nun von einem Windows Client eine neue VPN Verbindung auf kann man auf diesem natürlich per PowerShell (bitte mit erweiterten Rechten) prüfen ob seine Änderungen gegriffen haben:

Plain text
Copy to clipboard
Open code in new window
EnlighterJS 3 Syntax Highlighter
Get-NetIPsecMainModeSA | Select-Object -First 1
Screenshot des Kommandos Get-NetIPsecMainModeSA | Select-Object -First 1 inkl Konsolenausgabe.

Wichtig sind dann:

CipherAlgorithm
HashAlgorithm
GroupId

Im Standard wäre es:

Plain text
Copy to clipboard
Open code in new window
EnlighterJS 3 Syntax Highlighter
Encryption: 3DES
Authentication/Integrity: SHA-1
Key Size: DH Group 2 (1024 bit)
Encryption: 3DES Authentication/Integrity: SHA-1 Key Size: DH Group 2 (1024 bit)
Encryption: 3DES
Authentication/Integrity: SHA-1
Key Size: DH Group 2 (1024 bit)

Nach unseren Änderungen:

Plain text
Copy to clipboard
Open code in new window
EnlighterJS 3 Syntax Highlighter
Encryption: AES256
Authentication/Integrity: SHA-1
Key Size: DH Group 20 (384-bit elliptic curve group)
Encryption: AES256 Authentication/Integrity: SHA-1 Key Size: DH Group 20 (384-bit elliptic curve group)
Encryption: AES256
Authentication/Integrity: SHA-1
Key Size: DH Group 20 (384-bit elliptic curve group)

Windows Firewall…. Pfff… Ja natürlich lässt sich das Thema mit Gruppenrichtlinien erschlagen, nur ist dieses noch einmal ein Thema für sich, hm? Vor allem habe ich mich sehr schwer damit getan hier die Reihenfolge korrekt vorzugeben.

Fragen? Dann wie immer fragen 🙂

« Ältere Beiträge

© 2025 -=Kernel-Error=-

Theme von Anders NorénHoch ↑